So your dog just had a nail trimming accident, and now there’s blood everywhere—don’t panic! Knowing how do you stop a dog’s nail from bleeding is essential for every pet parent because let’s face it, those quick trims don’t always go as planned. Whether your pup caught their nail on the carpet or you accidentally clipped too short during grooming, a bleeding dog nail is one of those situations where staying calm and acting fast makes all the difference.
Table of Contents
- Why Do Dog Nails Bleed in the First Place?
- Method 1: Styptic Powder—Your First Line of Defense
- Method 2: Cornstarch or Flour as an Emergency Backup
- Method 3: Direct Pressure and Patience
- Method 4: Ice Pack Application for Persistent Bleeding
- Method 5: When to Call Your Vet (And Why You Might Need To)
- Preventing Nail Bleeding: The Best Medicine
- What NOT to Do When Your Dog’s Nail Is Bleeding
- Understanding Quick Exposure and Infection Risk
- The Emotional Side: Your Dog Will Be Fine
- Frequently Asked Questions
- Final Thoughts: Stay Calm and Carry Styptic Powder
Why Do Dog Nails Bleed in the First Place?
Before we dive into the solutions, let’s understand what’s happening under that keratin shell. A dog’s nail contains a blood vessel and nerve called the “quick.” When you trim a dog’s nail too short or they break it on something sharp, you’re essentially exposing this sensitive area. The quick is full of blood vessels, which is why even a tiny nick can look like a crime scene in your living room. Dark-nailed dogs make this even trickier because you literally can’t see where the quick ends—it’s like trying to find the light switch in a dark room.
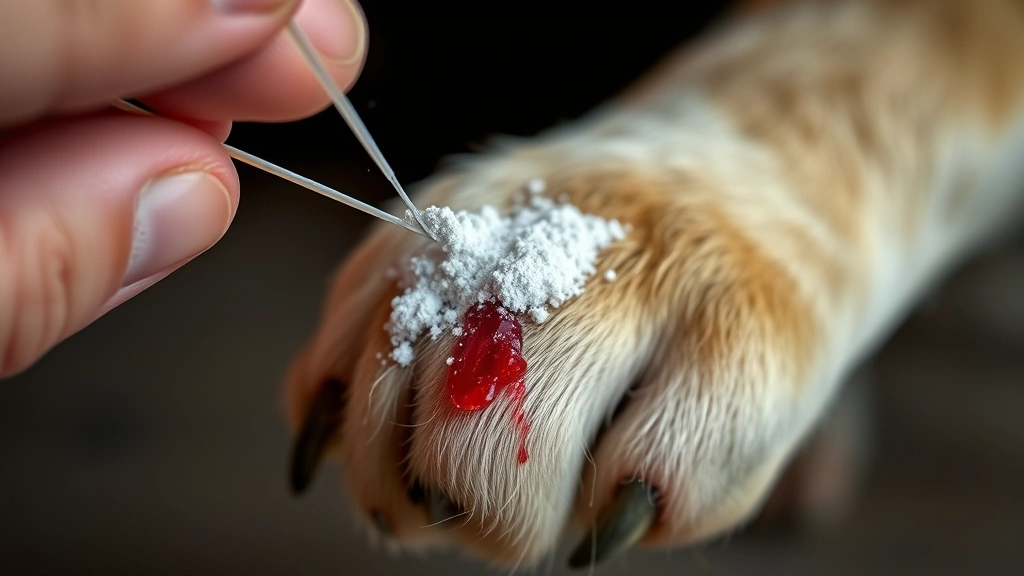
Method 1: Styptic Powder—Your First Line of Defense
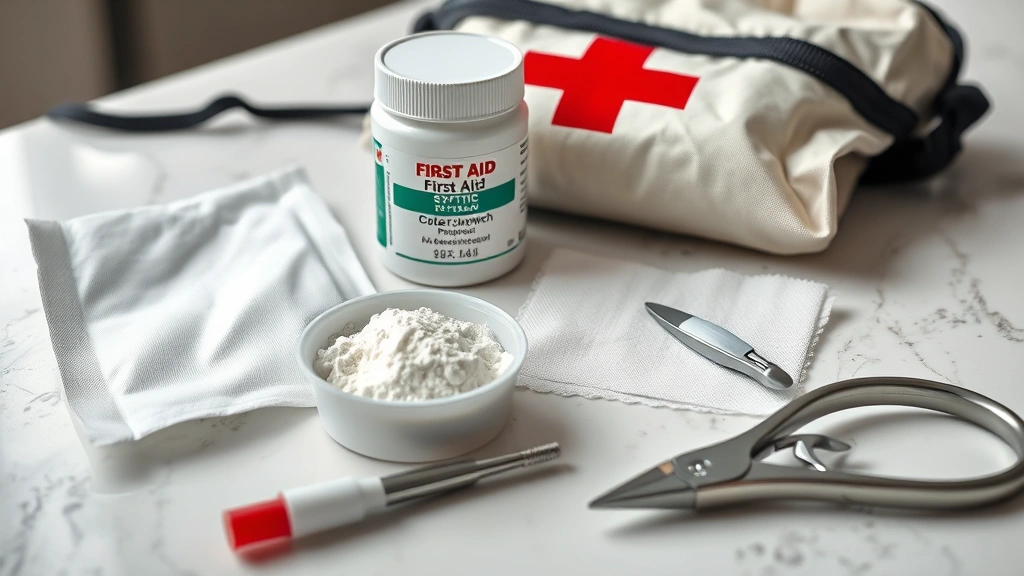
Styptic powder is basically the superhero of nail bleeding emergencies. This stuff contains ingredients like ferric subsulfate that help blood clot faster. Here’s how to use it like a pro: grab a small amount of powder and press it directly onto the bleeding nail for about 30 seconds. Your dog might shake their paw (they’re not fans of the sensation), but stick with it. If you don’t have styptic powder at home, you can find it at any pet store or order it online for next time. Pro tip: keep a container in your first-aid kit next to your nail clippers.
Some pet owners swear by human styptic products like those used for shaving cuts, but veterinary-specific products are gentler on your pup’s sensitive nails. The American Kennel Club recommends keeping styptic powder on hand for all grooming situations.
Method 2: Cornstarch or Flour as an Emergency Backup
Didn’t have styptic powder when disaster struck? Welcome to the “let’s raid the kitchen” method. Cornstarch and all-purpose flour work surprisingly well in a pinch because they help absorb blood and promote clotting. Dab the bleeding nail into a small pile of cornstarch or flour and hold it there for 30-60 seconds. Your dog’s paw might look like they’ve been baking cookies, but this method actually works. The starch particles help form a temporary seal over the wound.
While this isn’t as effective as styptic powder, it’s a legitimate emergency solution when you’re in a bind. Just make sure you’re using plain cornstarch or flour—no seasoned varieties, please.
Method 3: Direct Pressure and Patience
Sometimes the simplest method is the best one. If you’ve got nothing else available, grab a clean cloth or paper towel and apply firm, direct pressure to the bleeding nail. Hold it for 3-5 minutes without peeking (I know it’s tempting). This allows the blood to start clotting naturally. After a few minutes, gently release the pressure and check if the bleeding has slowed. If it’s still going strong, reapply pressure for another few minutes.
This method requires patience and a calm dog, but it works. The key is consistent pressure without interruption. If your pup is wiggling around like they’ve had three espressos, you might need a second person to help keep them still.
Method 4: Ice Pack Application for Persistent Bleeding
If the bleeding just won’t quit after several minutes, try applying ice or a cold compress to the area. Cold temperatures cause blood vessels to constrict, which slows bleeding. Wrap an ice pack in a thin cloth (don’t apply ice directly to the nail) and hold it against the bleeding nail for 5-10 minutes. This works especially well for nails that are actively spurting blood rather than just oozing.
The cold sensation might distract your dog from the discomfort of the bleeding nail, making them sit still longer. Just watch out—some dogs hate the cold, so if your pup starts acting like you’re torturing them, move on to another method.

Method 5: When to Call Your Vet (And Why You Might Need To)
Here’s the honest truth: most nail bleeding stops within 5-15 minutes with one of the above methods. But some situations warrant professional help. If the bleeding won’t stop after 15-20 minutes of continuous pressure, if your dog is acting in pain, or if the nail is cracked all the way down to the nailbed, it’s time to call your vet. You can also reach out to pet telehealth services for quick advice if you’re unsure whether it’s serious.
Excessive bleeding can sometimes indicate underlying issues like bleeding disorders or infections. A vet visit isn’t overkill—it’s peace of mind. PetMD emphasizes that persistent bleeding is always worth professional evaluation.
Preventing Nail Bleeding: The Best Medicine
Let’s be real: prevention is way easier than dealing with an emergency. Here’s how to avoid the whole bloody mess in the first place. First, invest in quality nail clippers designed specifically for dogs. Dull clippers crush the nail instead of cutting cleanly, which increases bleeding risk. Second, trim only the clear or white part of the nail, leaving plenty of space between your clippers and the quick. If your dog has dark nails, trim small amounts at a time and look for the tiny dark circle in the center—that’s your warning sign you’re getting close to the quick.
Consider having a professional groomer handle nail trims if you’re nervous. Many vets and grooming facilities have the experience and proper lighting to avoid accidents. Regular trims every 3-4 weeks also keep nails shorter overall, making them less likely to break on their own.
What NOT to Do When Your Dog’s Nail Is Bleeding
Let’s talk about the mistakes people make out of panic. Don’t use a tourniquet—you’re not trying to stop a limb from falling off. Don’t apply hydrogen peroxide or alcohol because these can irritate the wound and actually slow clotting. Don’t bandage the nail too tightly because it can cut off circulation. And please, don’t freak out visibly in front of your dog—they pick up on your anxiety and get more stressed, which raises their heart rate and makes bleeding worse.
Also, resist the urge to constantly check if the bleeding has stopped. Every time you lift the cloth or powder, you’re disrupting the clotting process. Leave it alone and let nature do its thing.
Understanding Quick Exposure and Infection Risk
When the quick is exposed, you’re not just dealing with bleeding—you’re also dealing with a potential infection risk. The quick contains nerve endings, which is why your dog might be limping or acting tender on that paw for a day or two after the incident. This is normal. However, if you notice swelling, pus, or your dog refusing to put weight on the paw after 24 hours, that’s a sign of infection and warrants a vet visit. Emergency vet services can assess whether antibiotics are needed.
Keep the nail clean and dry after the bleeding stops. You might want to avoid long walks in wet grass for a day or two to reduce infection risk.
The Emotional Side: Your Dog Will Be Fine
Here’s something nobody talks about: you’re probably more traumatized than your dog. That guilty feeling when you realize you clipped too short? Totally normal. But here’s the thing—your dog isn’t holding a grudge. Dogs are remarkably resilient, and a bleeding nail is a minor injury in the grand scheme of things. They’ll forget about it in five minutes, even if you’re replaying the incident in your head for the next week.
The best way to move forward is to learn from it and do better next time. Keep styptic powder on hand, use better lighting during nail trims, or let a professional handle it. Your dog will appreciate your efforts to avoid a repeat performance.
Frequently Asked Questions
How long does it take for a dog’s bleeding nail to stop?
Most dog nail bleeding stops within 5-15 minutes with proper treatment using styptic powder or direct pressure. If bleeding continues past 20 minutes, contact your vet to rule out clotting disorders or other complications.
Can I use a regular bandage on my dog’s bleeding nail?
You can use a loose bandage if needed, but avoid wrapping it too tightly. Most bleeding nails don’t require bandaging once the bleeding stops. Just keep the paw clean and dry for the next 24 hours.
Is a bleeding dog nail an emergency?
Not usually. Most bleeding nails are minor injuries that stop with home treatment. However, if bleeding won’t stop after 20 minutes, if your dog shows signs of infection, or if they’re unable to bear weight on the paw, contact your vet.
What’s the difference between the quick and the nail?
The nail is the hard keratin shell that protects the paw. The quick is the blood vessel and nerve inside the nail. When you clip into the quick, it bleeds because it’s full of blood vessels.
Should I avoid trimming my dog’s nails after a bleeding incident?
Wait at least 1-2 weeks before attempting another trim to let the nail fully heal. Use that time to practice better technique or schedule an appointment with a professional groomer.
Can I use human styptic powder on my dog?
While some human styptic products are safe, it’s better to use veterinary-specific products designed for pets. They’re gentler and formulated with your dog’s needs in mind.
Final Thoughts: Stay Calm and Carry Styptic Powder
Knowing how do you stop a dog’s nail from bleeding turns a panic situation into a manageable moment. Whether you use styptic powder, cornstarch, direct pressure, or ice, the key is staying calm and acting quickly. Keep emergency supplies on hand, invest in quality nail clippers, and don’t hesitate to call your vet if something seems off. Your dog’s paws are precious, and with these five proven methods in your toolkit, you’re ready for whatever nail-trimming disasters come your way. Remember: every dog owner has been there, and every dog recovers just fine.