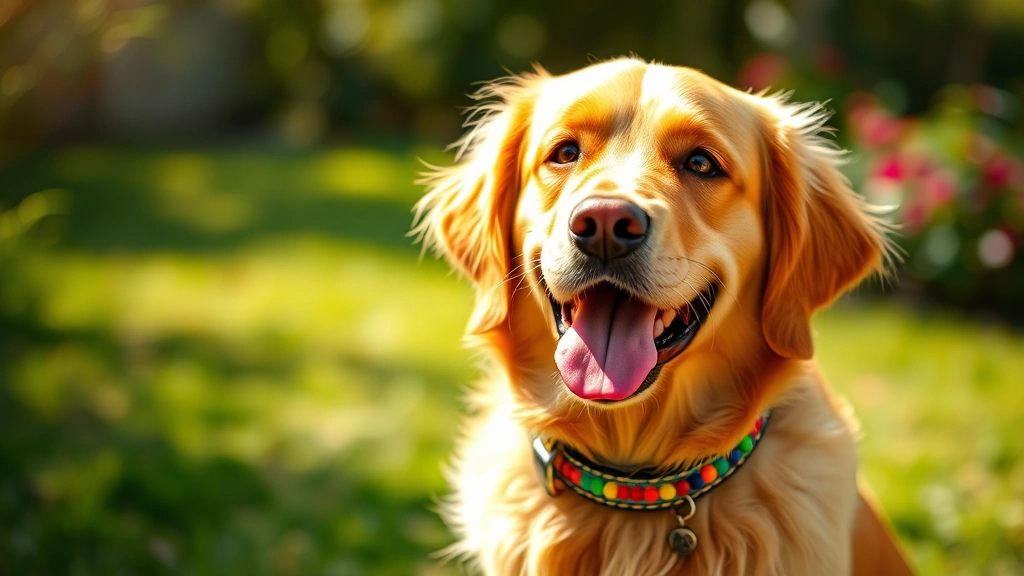
Learning how to make a dog collar is easier than you think, and honestly, it’s way more fun than scrolling through endless online shops while your pup judges you from the couch. Whether you’re a crafty person or someone who can barely operate a hot glue gun, we’ve got five methods that’ll have your dog sporting a custom collar faster than they can say “squirrel.” Plus, homemade collars are often more affordable, personalized, and perfect for dogs with sensitive skin or unique sizing needs.
Table of Contents
- Why Make Your Own Dog Collar?
- Method 1: The Simple Fabric Collar (No Sewing Required)
- Method 2: The Classic Hand-Sewn Collar
- Method 3: The Paracord Collar (For Adventure Pups)
- Method 4: The Leather Collar (For the Sophisticated Canine)
- Method 5: The Beaded or Decorative Collar
- Essential Materials You’ll Need
- Measuring Your Dog for the Perfect Fit
- Safety Considerations and Best Practices
- Customization Ideas That’ll Make Other Dog Owners Jealous
- Troubleshooting Common Collar-Making Issues
- Maintenance and Care for Homemade Collars
- When to Upgrade to a New Collar
- Frequently Asked Questions
- Conclusion: Your Dog Deserves a Custom Collar
Why Make Your Own Dog Collar?
Before we dive into the nitty-gritty, let’s talk about why DIY dog collars are actually brilliant. Store-bought options can be pricey, especially if your pup is a tank-sized breed or has specific comfort requirements. Making your own collar lets you choose materials that work best for your dog’s lifestyle—whether that’s durable workwear-inspired designs or soft, breathable fabrics. You’ll also know exactly what’s going into the collar, which is huge if your furry friend has allergies or sensitivities.
Plus, there’s something genuinely satisfying about watching your dog prance around in something you created with your own two hands. It’s basically free therapy.
Method 1: The Simple Fabric Collar (No Sewing Required)
This is the gateway drug to collar-making. If you can tie a knot, you can do this. Grab a sturdy fabric strip (cotton webbing works beautifully), measure it around your dog’s neck with two fingers of space for comfort, and cut it to length. Now here’s where it gets fun: fold the ends over a plastic buckle (hardware stores have these cheap), and secure them with fabric glue or a hot glue gun. Let it dry completely, add a D-ring for the leash attachment, and boom—you’ve got yourself a custom collar. This method is perfect for sustainable pet grooming enthusiasts who want eco-friendly options.
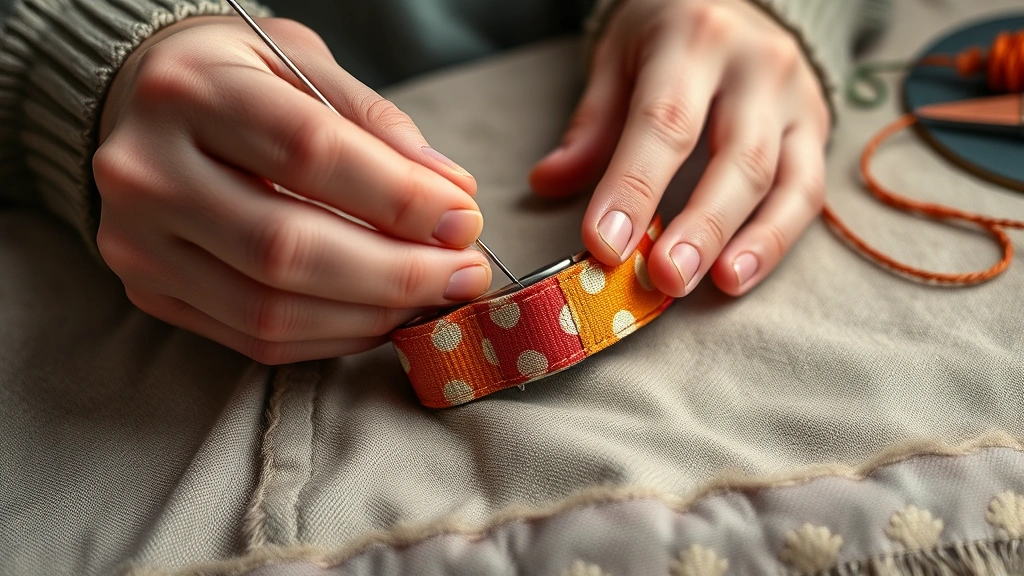
Method 2: The Classic Hand-Sewn Collar
For the slightly more ambitious among us, hand-sewing a dog collar gives you ultimate control over every detail. Start with two pieces of sturdy fabric (canvas or denim are champs here), cut them to your desired width and length, and place them right-sides together. Sew three sides using a simple running stitch, then flip it inside-out like you’re performing doggy surgery. Fold in the raw edges, sew the opening closed, and attach your hardware. This method creates a collar that’ll outlast most relationships.
The beauty? You can add padding between the layers for extra comfort, which is especially considerate for dogs with delicate necks or those prone to collar chafing.
Method 3: The Paracord Collar (For Adventure Pups)
If your dog is basically a tiny mountain climber, a paracord collar is their spirit animal. You’ll need paracord (the stuff survivalists obsess over), a plastic buckle, and about 30 minutes of your time. Cut your paracord to length, thread it through the buckle, and braid or weave the strands together in whatever pattern speaks to your soul. The result? A collar that’s virtually indestructible and looks legitimately cool. Plus, paracord comes in ridiculous color combinations, so your pup can match their personality.
Method 4: The Leather Collar (For the Sophisticated Canine)
Nothing screams “I have a fancy dog” quite like a leather collar. If you’re working with leather, you’ll want to invest in a leather punch (it’s not as scary as it sounds) to create holes for your hardware. Cut your leather to size, punch holes for the D-ring and buckle, and assemble. If you’re feeling extra, add some decorative stitching or tooling. Leather collars develop character over time, getting softer and more beautiful as your dog wears them. Fair warning: your dog might start looking like they belong in a dog show.
Method 5: The Beaded or Decorative Collar
For the Instagram-famous pups out there, a beaded collar is the way to go. String beads onto sturdy elastic or cord, tie it securely, and adjust to fit your dog’s neck with appropriate room for comfort. You can create patterns, use your dog’s favorite colors, or spell out their name if you’re feeling fancy. This method works great for small dogs and is perfect for special occasions or photo shoots. Just make sure all beads are securely fastened—loose beads are a choking hazard, and nobody wants that drama.
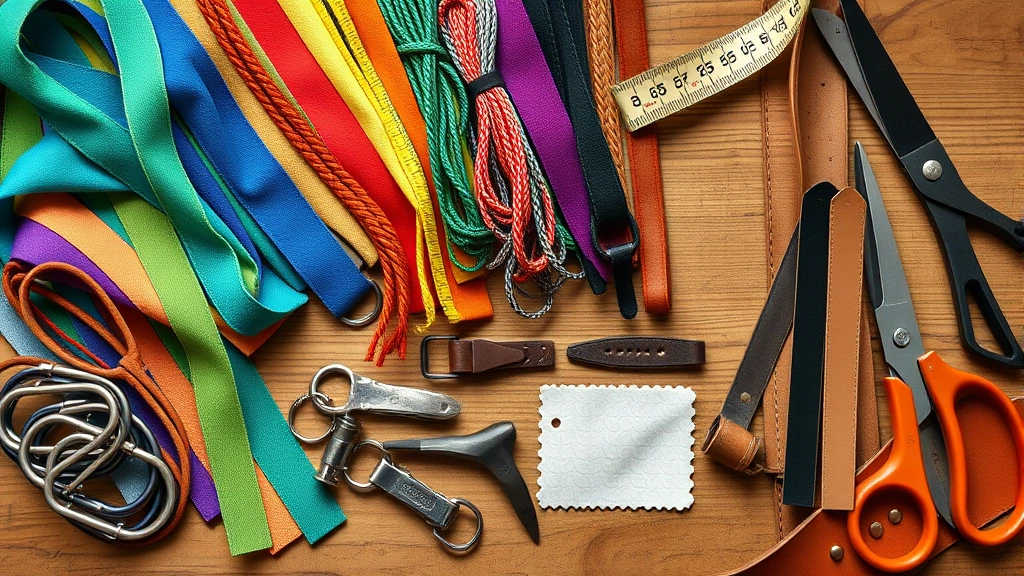
Essential Materials You’ll Need
Regardless of which method you choose, here are your basic supplies: fabric or leather (depending on the collar type), a D-ring for leash attachment, a plastic or metal buckle, and either needle and thread, fabric glue, or a sewing machine. Measuring tape is non-negotiable—you don’t want a collar that’s too tight or so loose it slips off. Optional but helpful: scissors, a hot glue gun, and your dog’s patience (which may be limited).
Measuring Your Dog for the Perfect Fit
This is where people mess up, and then their dog looks like they’re wearing a noose. Measure around your dog’s neck with a soft measuring tape, then add two fingers’ worth of space. Your dog should be able to move comfortably without the collar sliding around or restricting their airway. For growing puppies, measure more generously and plan to adjust as they grow. When in doubt, err on the side of loose—you can always tighten it, but you can’t undo a too-tight collar.
Safety Considerations and Best Practices
Before your pup struts around in their new accessory, check that all hardware is securely attached and there are no sharp edges that could cause irritation. Inspect the collar regularly for signs of wear, especially if your dog is a serial chewer or spends lots of time outdoors. Consider adding reflective tape or material if your dog walks at dusk or dawn—visibility is crucial for safety. If your dog has never worn a collar before, introduce it gradually and monitor them for any signs of discomfort or allergic reactions. For more guidance on pet safety, check out the American Kennel Club’s resources.
Customization Ideas That’ll Make Other Dog Owners Jealous
Once you’ve mastered the basics, get creative. Add your dog’s name using embroidery thread, attach patches that reflect their personality, or use fabric paint to create custom designs. You could incorporate colors that match your home décor (yes, some of us are that person), add bells for jingling fun, or use glow-in-the-dark materials for nighttime visibility. The possibilities are genuinely endless, and your dog becomes a walking piece of your creativity. For eco-conscious pet parents, planet-conscious pet care practices extend to choosing sustainable materials for your DIY projects.
Troubleshooting Common Collar-Making Issues
If your collar keeps slipping, you might need a tighter buckle or additional adjustment points. Fraying fabric? Seal the edges with fabric glue or fray check before assembly. Hardware pulling away? Use stronger adhesive or sew it on in addition to gluing. Your dog refusing to wear it? Start with short wearing periods and reward them heavily—positive association is everything. If you’re struggling with any particular method, don’t hesitate to watch tutorial videos or ask in online crafting communities. There’s always someone who’s solved the exact problem you’re facing.
Maintenance and Care for Homemade Collars
Your handmade collar deserves love. Wash fabric collars by hand with mild soap and water, then air dry completely. Leather collars benefit from occasional conditioning with leather balm. Check the D-ring and buckle regularly for rust or damage, replacing them as needed. If your dog spends time in water, make sure your collar dries thoroughly to prevent mildew or deterioration. Proper maintenance means your collar will last longer and stay comfortable for your pup.
When to Upgrade to a New Collar
Even the best homemade collar won’t last forever. If you notice fraying, cracking, loose hardware, or signs of wear that compromise safety, it’s time to make a new one. Growing puppies will need larger collars as they develop, and active dogs might go through collars faster than couch potatoes. Think of it as an excuse to try a new design or method—each collar is an opportunity to improve your craft.
Frequently Asked Questions
Can I make a collar for a puppy using these methods?
Absolutely! Just measure your puppy’s neck and remember they’re growing rapidly. Make the collar with room for growth, or plan to remake it every few months. Puppies are also more likely to chew on their collars, so choose durable materials and monitor them closely.
What’s the best material for a dog with sensitive skin?
Soft, breathable fabrics like organic cotton or bamboo are ideal for sensitive pups. Avoid synthetic materials that trap moisture, and skip any dyes or treatments that might irritate their skin. Always choose hypoallergenic thread and hardware if possible.
How long does a homemade dog collar typically last?
It depends on the material and your dog’s activity level, but most well-made collars last 6-12 months before needing replacement. Leather collars can last longer, while fabric collars might need more frequent updates, especially for active dogs.
Is it safe to use elastic in dog collars?
Elastic can work for decorative or training collars, but it’s not ideal for everyday wear since it can stretch and lose its fit. If you use elastic, make sure it’s sturdy and check the fit regularly. For primary collars, stick with non-stretchy materials.
Can I add a GPS tracker to a homemade collar?
Yes! You can attach a small GPS tracker or AirTag using a secure attachment point on your collar. Just make sure the weight doesn’t strain your dog’s neck and that all attachments are completely secure. PetMD offers great guidance on pet safety technology.
What if my dog has an unusual neck size?
This is actually one of the biggest advantages of making your own collar. You can customize the length, width, and materials to fit your dog perfectly, whether they’re a tiny Chihuahua or a massive Great Dane. DIY is the answer for dogs that fall outside standard sizing.
Conclusion: Your Dog Deserves a Custom Collar
Learning how to make a dog collar is a rewarding skill that benefits both you and your furry friend. Whether you choose the simplicity of a no-sew fabric collar, the durability of paracord, or the elegance of leather, you’re creating something unique that reflects your dog’s personality and your care for them. The methods we’ve covered range from absolute beginner-friendly to slightly more involved, so there’s genuinely something for everyone. Your dog gets a comfortable, customized collar, you get the satisfaction of DIY success, and everyone wins. Plus, you’ll have a conversation starter every time someone asks where you got that amazing collar. Now stop reading and go make something awesome for your pup—they’re waiting!