Learning how to trim dog nails is one of the most practical skills any dog owner can master—and honestly, it’ll save you a fortune on grooming appointments. If you’ve ever heard that clickety-clack sound of overgrown nails on hardwood floors, you know it’s time to grab those clippers. But before you panic about accidentally hitting the quick or your pup staging a full meltdown, take a breath. We’ve got you covered with a straightforward guide that even nervous pet parents can follow.
Table of Contents
- Why Regular Dog Nail Trimming Matters
- Gather Your Dog Nail Clipping Supplies
- Step 1: Choose the Right Environment and Timing
- Step 2: Get Your Dog Comfortable With Handling
- Step 3: Identify the Quick (The Critical Part)
- Step 4: Execute the Perfect Trim
- Step 5: Finish With Filing and Inspection
- Common Mistakes to Avoid When Trimming Dog Nails
- When to Call a Professional Groomer
- Nutrition and Nail Health Connection
- Frequently Asked Questions
- Final Thoughts: You’ve Got This
Why Regular Dog Nail Trimming Matters
Your dog’s nails are like tiny little hiking boots—they need maintenance. When nails get too long, they can curl under and cause serious pain, affect your dog’s gait, and even lead to joint problems down the road. Plus, overgrown nails snag on carpet, scratch furniture, and turn your legs into scratch pads during cuddle time. Regular trimming keeps your pup comfortable and your home intact. Most vets recommend trimming every 3-4 weeks, though some dogs (especially senior dogs and those who don’t get much outdoor activity) might need it more frequently.
Gather Your Dog Nail Clipping Supplies
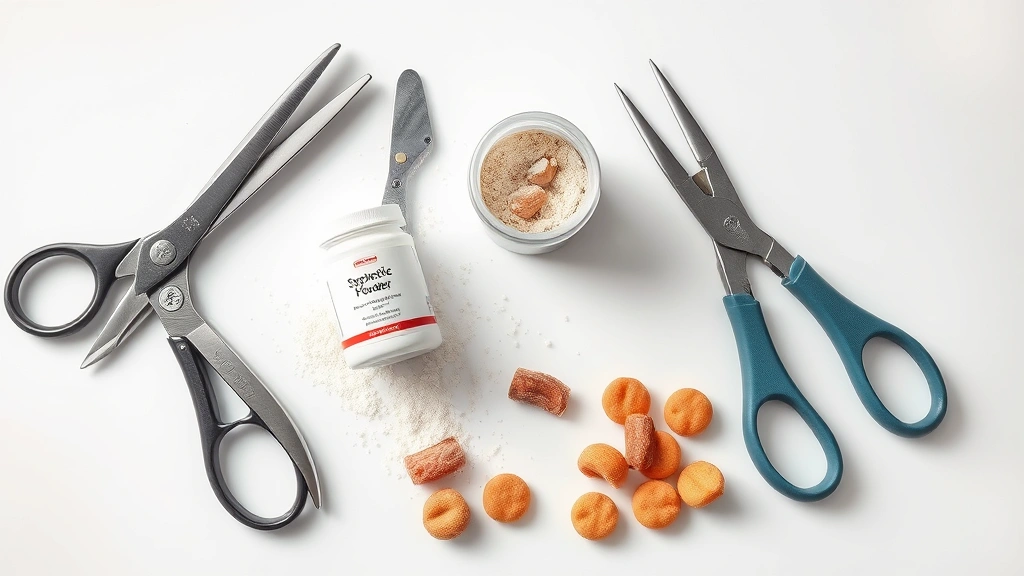
Before you attempt dog nail trimming, make sure you have the right tools in your arsenal. You’ll need:
- Dog nail clippers: Choose between scissor-style, guillotine-style, or grinder types. Scissor-style works great for thick nails, while guillotine clippers are perfect for smaller breeds.
- Styptic powder: This is your safety net. If you accidentally nick the quick, styptic powder stops bleeding fast. We recommend keeping witch hazel on hand as a natural alternative.
- Treats: High-value rewards make the whole experience less traumatic for your furry friend.
- Flashlight or headlamp: You need to see the quick clearly, especially on dark-nailed dogs.
- Nail file: Smoothing rough edges prevents snagging.
Step 1: Choose the Right Environment and Timing
Set yourself up for success by picking a calm, well-lit space. Your bathroom or kitchen with good lighting works perfectly. Avoid trimming when your dog is overly excited or anxious—wait until they’re naturally relaxed, maybe after a walk or playtime. Sit on the floor or a low chair so you’re at a comfortable angle. If your pup is a wiggle worm, having a partner help hold them steady makes a world of difference. Keep your virtual pet checkup notes handy in case your vet mentioned anything specific about your dog’s nail health.
Step 2: Get Your Dog Comfortable With Handling
Before you even think about clippers, spend a few days just handling your dog’s paws. Pick them up, massage them gently, and reward with treats. Let your pup sniff the clippers without any pressure. This desensitization phase is crucial—it teaches your dog that paw handling isn’t scary. Some dogs are naturally chill about it, while others need extra reassurance. If your dog has anxiety issues, consider consulting with your vet about calming supplements or techniques.
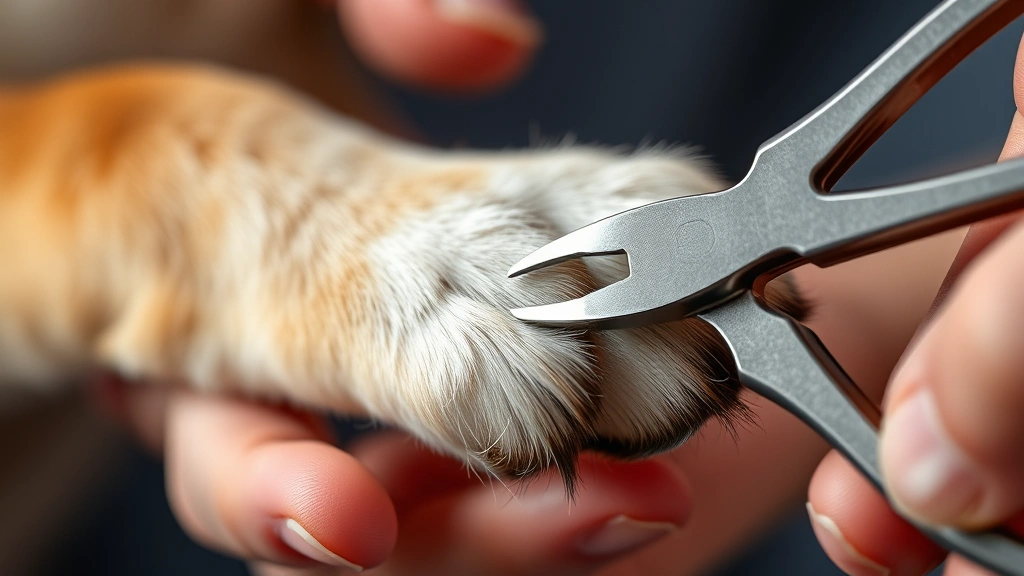
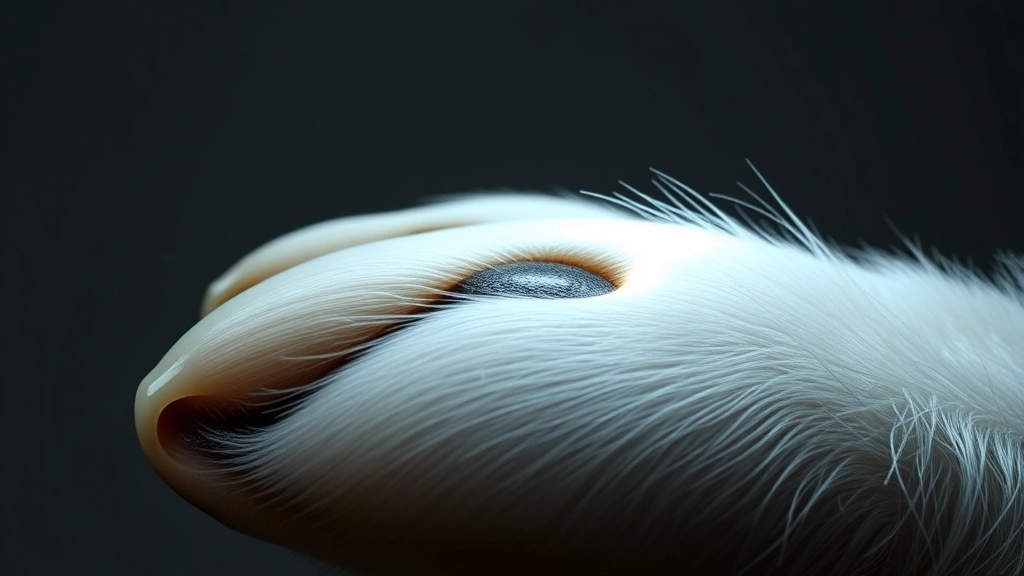
Step 3: Identify the Quick (The Critical Part)
The quick is the nerve and blood vessel inside the nail—hitting it hurts and causes bleeding. On light-colored nails, you can actually see a small dark circle in the center of the nail when you look at it from the side. This dark spot is the quick. On dark nails, it’s trickier, so use your flashlight and look at the underside of the nail. You’ll see a small dark dot surrounded by lighter tissue. Only trim the lighter part. A good rule: trim about 2-3mm away from where you think the quick is. When in doubt, trim less rather than more. You can always take another small slice off.
Step 4: Execute the Perfect Trim
Hold the clippers perpendicular to the nail and make one quick, confident cut. Don’t squeeze slowly—it’s uncomfortable for your dog and increases the risk of splintering. Trim the nail at a slight angle, mimicking the natural curve of the nail. Work on one nail at a time, giving your pup a treat after each successful trim. This positive reinforcement is gold. If you’re using a grinder instead of clippers, use short bursts and let the nail cool between sessions. Grinders take longer but give you more control and reduce the risk of hitting the quick. For nail clipping techniques on anxious dogs, consider using a grooming restraint or having your vet demonstrate proper form first.
Step 5: Finish With Filing and Inspection
After trimming, use a nail file to smooth any rough edges. This prevents snagging and makes the whole experience feel more professional. Inspect each nail to make sure you got them all evenly. Back paws sometimes get forgotten—don’t let that happen. Check between the paw pads for any matted hair or debris while you’re at it. If you did accidentally hit the quick (it happens to everyone), apply styptic powder immediately and hold pressure for a minute. Your dog will be fine, and they’ll probably be more forgiving than you expect.
Common Mistakes to Avoid When Trimming Dog Nails
Don’t rush the process just to get it over with. Hurried trims lead to mistakes. Avoid trimming when your dog is wet or freshly bathed—nails are softer and more likely to splinter. Never use human nail clippers; they’re designed differently and will crush your dog’s nails. Don’t trim too much at once, especially if you’re new to this. Building confidence (yours and your dog’s) takes time. If your dog has dewclaws (those little nails on the inside of the front legs), don’t forget about them. They don’t touch the ground and grow quickly, often curling into the skin.
When to Call a Professional Groomer
If your dog is extremely anxious, aggressive, or has mobility issues, there’s zero shame in letting a professional handle it. Groomers trim nails safely every single day and have the experience to handle difficult dogs. Some vets also offer nail trimming services, which can be great if your pup needs calming medication beforehand. Consider professional grooming part of your sustainable pet grooming routine. Think of it as an investment in your dog’s health and your sanity.
Nutrition and Nail Health Connection
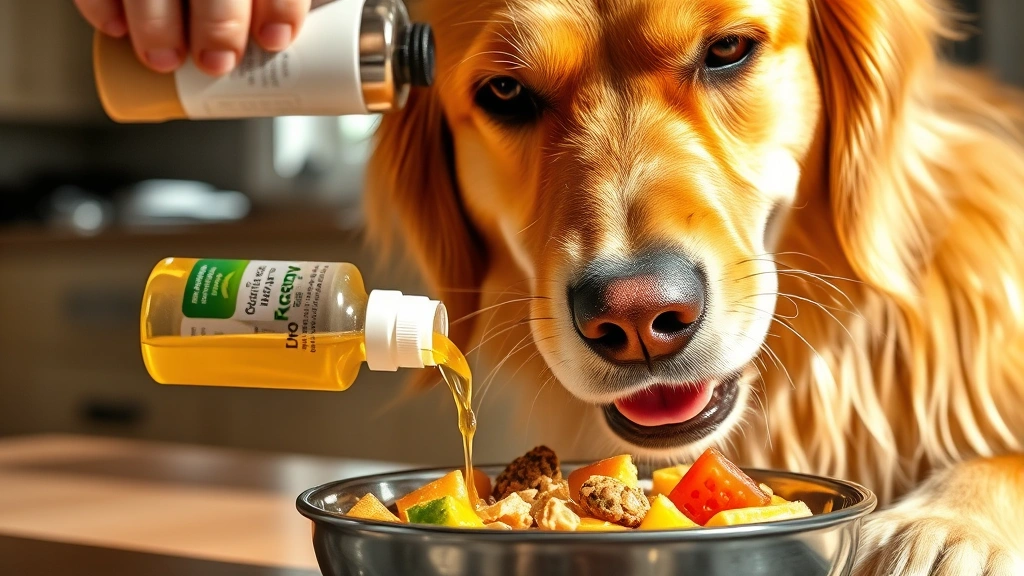
Here’s something many people don’t realize: your dog’s diet affects nail quality. Strong, healthy nails start from within. Foods rich in biotin, omega fatty acids, and protein support keratin production. Your dog’s nails should be smooth and strong, not brittle or peeling. Consider incorporating skin and coat health foods into their diet, and discuss anti-inflammatory foods for pets with your vet if your dog has any nail or paw issues. Proper nutrition means healthier, faster-growing nails that are easier to trim.
Frequently Asked Questions
How often should I trim my dog’s nails?
Most dogs need nail trimming every 3-4 weeks. However, if your dog spends a lot of time outdoors on rough surfaces, their nails may wear down naturally and need less frequent trimming. Senior dogs and indoor dogs often need more frequent trims. Listen for the clicking sound on floors—that’s your signal it’s time.
What if my dog won’t sit still?
Try trimming just one or two nails per session and building up gradually. Use high-value treats (like chicken or cheese) as motivation. Some owners find it helpful to trim nails right after exercise when their dog is tired. If your dog is extremely anxious, talk to your vet about anxiety-reducing options.
Can I use a Dremel on dog nails?
Absolutely! Many people prefer grinders (Dremels) because they’re safer and give better control. Start slowly and let your dog get used to the sound. Grinders work especially well for dogs with dark nails where the quick is harder to see. Just avoid letting the grinder get too hot—take breaks between nails.
What do I do if I hit the quick?
Don’t panic—you and your dog will survive. Apply styptic powder immediately and hold gentle pressure for about a minute. If you don’t have styptic powder, a small amount of flour or cornstarch can work in a pinch. Avoid letting your dog lick the nail, and keep an eye on it for signs of infection over the next few days.
Are there breed-specific nail trimming differences?
Larger breeds often have thicker, tougher nails that need guillotine-style clippers or grinders. Small breeds might do fine with scissor-style clippers. Dogs with dewclaws (many breeds have them on front paws) need special attention since those nails don’t wear down naturally. Always adjust your approach based on your individual dog’s nail thickness and temperament.
Final Thoughts: You’ve Got This
Mastering how to trim dog nails is absolutely achievable, even if you’re nervous the first time. The key is taking it slow, staying calm, and remembering that your dog picks up on your energy. Start with just one or two nails to build confidence, invest in quality tools, and don’t hesitate to ask your vet or groomer for a demonstration. Before you know it, nail trimming will be part of your regular pet care routine—no appointment needed. Your dog’s paws will thank you, and your hardwood floors will stay scratch-free. Now grab those clippers and show those nails who’s boss!