Pulling ticks from dogs is one of those pet parent tasks that makes your skin crawl, but it’s absolutely essential for keeping your furry friend healthy and happy. Ticks aren’t just annoying parasites—they’re disease-carrying villains that can transmit Lyme disease, Rocky Mountain spotted fever, and other nasty conditions to your pup. The good news? You don’t need a veterinary degree to remove them safely. We’re breaking down the five best methods to get those bloodsuckers off your dog without causing harm or leaving tick parts behind.
Table of Contents
- Why Pulling Ticks from Dogs Matters (More Than You Think)
- Method 1: The Tweezers Technique (The Classic Approach)
- Method 2: Tick Removal Tools (The Specialized Gadget)
- Method 3: Tick Removal Cards (The Budget-Friendly Option)
- Method 4: The Tick Lasso (The DIY Approach)
- Method 5: Preventative Treatments (The Best Defense)
- Tick Removal in Dogs: What NOT to Do
- After You’ve Finished Pulling Ticks from Dogs
- Seasonal Tick Prevention for Dogs
- When to Call Your Vet
- Frequently Asked Questions
- Final Thoughts: Stay Calm and Remove Safely
Why Pulling Ticks from Dogs Matters (More Than You Think)
Before we dive into the how-to, let’s talk about the why. Ticks embed their heads into your dog’s skin and feed on blood for days. During this time, they can transmit pathogens directly into your dog’s bloodstream. According to the American Kennel Club, tick-borne illnesses affect thousands of dogs annually, and early removal significantly reduces transmission risk.
Improper tick removal—like squeezing, burning, or yanking—can cause the tick to regurgitate infected fluids into your dog’s wound. That’s why technique matters. Pulling ticks from dogs correctly means being methodical, calm, and using the right tools.
Method 1: The Tweezers Technique (The Classic Approach)
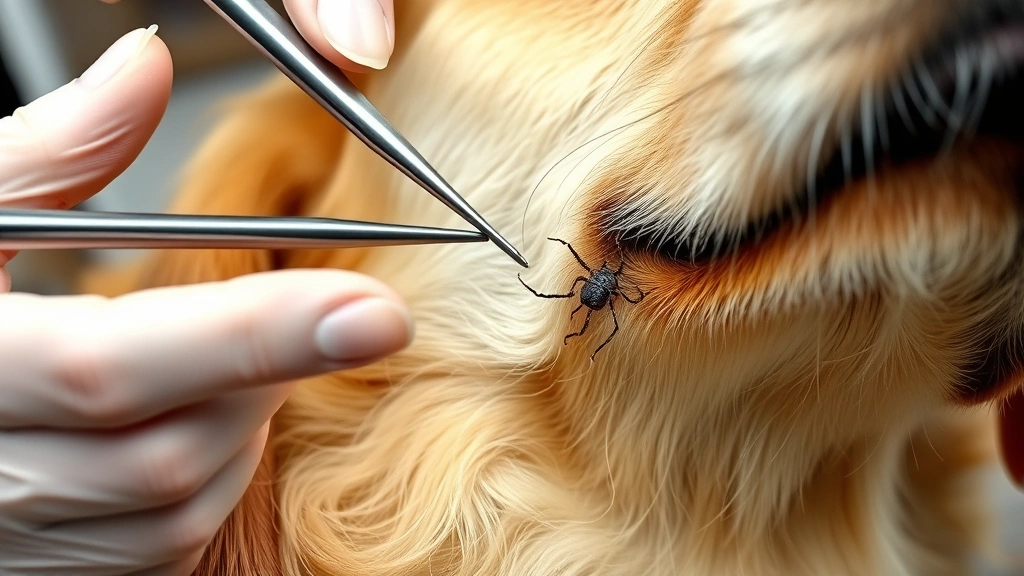
This is the gold standard for tick removal and what most veterinarians recommend. Here’s the step-by-step process:
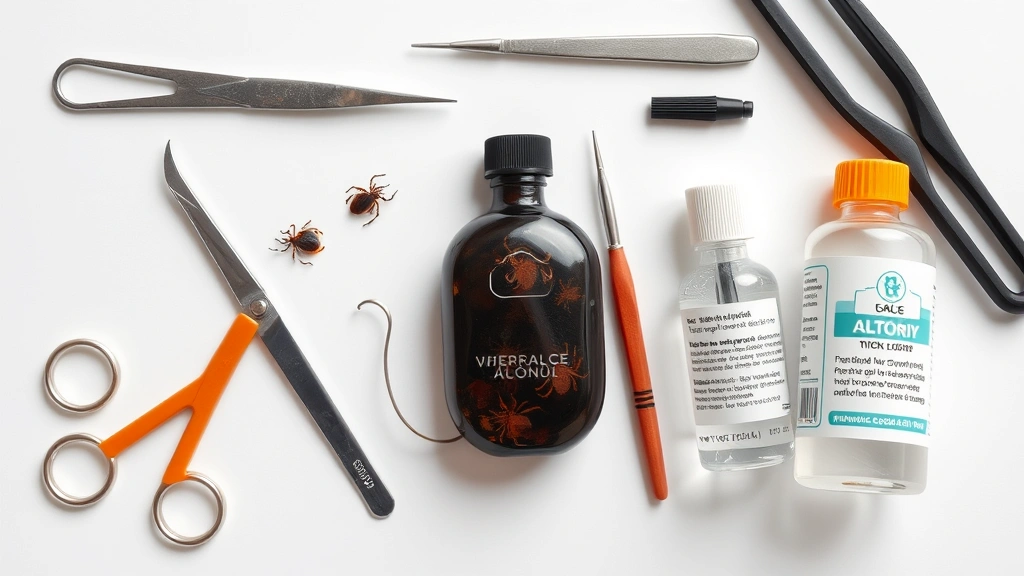
What You’ll Need: Fine-tipped tweezers, rubbing alcohol, antibiotic ointment, and a container with a lid.
The Process: First, part your dog’s fur around the tick so you can see the head clearly. Grasp the tick as close to the skin as possible—you’re aiming for the head, not the body. Pull straight upward with steady, even pressure. Don’t twist, jerk, or squeeze. Once removed, immediately place the tick in a container of rubbing alcohol to kill it. Clean the bite area with alcohol or antibiotic ointment.
Why it works: Tweezers give you precision and control, minimizing the risk of leaving mouthparts behind. This method takes patience but delivers results.
Method 2: Tick Removal Tools (The Specialized Gadget)
Tick removal hooks and specialized tick tweezers have become wildly popular, and for good reason. Products like the Tick Twister or O’Tom Tick Remover feature a unique notched design that slides under the tick’s body.
How to Use: Slide the tool under the tick until the notch fits snugly around the body. Rotate gently (usually counterclockwise) to loosen the tick’s grip, then lift straight up. The rotational motion mimics how ticks naturally detach.
These tools are fantastic for removing multiple ticks or for owners with shaky hands. They’re inexpensive (usually under $10), reusable, and work on ticks of all sizes. Keep one in your dog’s first aid kit—you’ll be glad you did.
Method 3: Tick Removal Cards (The Budget-Friendly Option)
If you’re looking for an ultra-affordable solution, tick removal cards are your answer. These thin, plastic cards have a notched edge designed to slide under a tick and scrape it off.
The Technique: Position the card so the notch sits over the tick. Gently slide it forward, letting the tick slide into the notch. As you continue forward, the tick should dislodge and fall onto the card. Drop it into alcohol immediately.
Tick cards work best on fully engorged ticks that are easier to dislodge. They’re portable, affordable, and perfect for keeping in your wallet or car. The downside? They require a steady hand and work better on larger ticks than small nymphs.
Method 4: The Tick Lasso (The DIY Approach)
This method uses a simple loop of thread or dental floss tied around the tick’s body, just above where it enters the skin. Gently pull upward, maintaining steady pressure.
Why It Works: The loop restricts blood flow to the tick’s body, causing it to release its grip. It’s a gentler alternative to direct pulling and reduces the risk of squeezing the body.
The Catch: This method requires patience and a very calm dog. It can take 10-15 minutes for the tick to release, and fidgeting dogs make it nearly impossible. Save this for your chill pup or as a last resort.
Method 5: Preventative Treatments (The Best Defense)
While not technically a removal method, prevention is the ultimate tick-pulling strategy. Modern tick preventatives like topical treatments, oral medications, and collars kill ticks before they embed.
Products containing fipronil, imidacloprid, or pyrethrins are highly effective. Monthly treatments or tick collars lasting 8 months can reduce tick populations dramatically. Talk to your vet about options like PetMD’s recommended preventatives to find what works best for your dog’s age, weight, and health status.
Prevention also means checking your dog daily during tick season, especially if they spend time outdoors. A quick once-over while petting your pup can catch ticks before they become a problem.
Tick Removal in Dogs: What NOT to Do
Let’s address the myths and dangerous practices people still use:
Don’t Burn It: Holding a match or lighter to a tick doesn’t work and risks burning your dog’s skin.
Don’t Squeeze the Body: Crushing the tick’s abdomen forces infected fluids into the wound. Bad idea.
Don’t Use Petroleum Jelly or Nail Polish: These suffocation methods don’t work and waste precious time.
Don’t Yank Without Grabbing the Head: Pulling the body away from an embedded head leaves mouthparts in the skin, causing infection and inflammation.
After You’ve Finished Pulling Ticks from Dogs
Removal is only half the battle. Proper aftercare prevents infection:
Clean the Wound: Wash the bite area with soap and water or rubbing alcohol. Apply antibiotic ointment if the skin is broken.
Dispose of the Tick Safely: Never crush ticks with your bare hands. Use alcohol, a sealed container, or flush down the toilet. Some people save ticks in a sealed bag to show their vet if their dog develops symptoms.
Monitor the Bite: Watch for signs of infection like redness, swelling, or discharge. If your dog develops a rash, fever, or lameness in the following weeks, contact your vet immediately.
Document the Removal: If you’re in a tick-heavy area, keep a log of tick removals. This helps your vet identify patterns and recommend stronger preventatives.

Seasonal Tick Prevention for Dogs
Understanding tick season in your area helps you stay ahead of the problem. Ticks are active in spring and fall, though they can survive year-round in milder climates. During peak season, check your dog daily and consider more aggressive prevention strategies.
For dogs that spend lots of time outdoors, combining preventative treatments with environmental control—like using diatomaceous earth for tick control—creates a multi-layered defense. You can also explore natural mosquito and tick repellents alongside veterinary-approved treatments.
When to Call Your Vet
Some situations require professional help. Call your vet if:
The tick’s head breaks off and remains embedded. Your vet can remove it or prescribe antibiotics. Your dog develops a rash, fever, or lameness after tick removal. Your dog has an allergic reaction to the bite. You’re unsure about tick removal or your dog won’t cooperate. Your dog is very young, very old, or has health conditions that complicate removal.
Veterinarians have specialized tools and experience handling difficult removals. It’s worth the visit if you’re uncomfortable or if complications arise.
Frequently Asked Questions
Can I use my fingers to pull a tick off my dog?
Technically yes, but it’s not ideal. Bare fingers don’t give you the precision or control of tweezers or specialized tools. If you must use your fingers, wear gloves and wash your hands immediately afterward. Ticks can transmit diseases to humans too.
How long does it take to remove a tick?
With tweezers or removal tools, a few seconds to a minute. With thread or floss, 10-15 minutes. The key is steady, patient pressure—rushing increases the risk of leaving parts behind.
Will my dog get sick from a tick bite?
Not always, but it’s possible. Tick-borne diseases like Lyme disease don’t affect every bitten dog. Early removal significantly reduces transmission risk. Watch for symptoms like fever, lethargy, loss of appetite, or joint pain in the weeks following a tick bite.
Can I prevent ticks entirely?
Prevention dramatically reduces tick exposure, but complete prevention is nearly impossible if your dog spends time outdoors. Combining preventative treatments, daily checks, and environmental control creates the strongest defense.
What’s the best tick prevention for dogs?
This depends on your dog’s age, weight, health status, and lifestyle. Talk to your vet about options. Some dogs do well with monthly topical treatments, while others benefit from oral medications or long-lasting collars.
Final Thoughts: Stay Calm and Remove Safely
Pulling ticks from dogs doesn’t have to be stressful. Armed with the right technique and tools, you can remove ticks quickly and safely. The five methods we’ve covered—tweezers, specialized removal tools, tick cards, thread, and preventative treatments—give you options for any situation.
Remember: patience, precision, and proper aftercare are your best friends. Keep your cool, grab that tick head, and pull straight up. Your dog will thank you, and you’ll sleep better knowing you’ve protected them from tick-borne illness.
Stock your dog’s first aid kit with tweezers and a tick removal tool, stay vigilant during tick season, and work with your vet to find the best prevention strategy. Your pup is counting on you to keep those parasites at bay.