Trimming your dog’s black toenails can feel like navigating through a minefield for many pet owners. Unlike clear or light-colored nails where the pink quick is easily visible, black nails present a unique challenge that requires patience, proper technique, and the right tools. The inability to see the quick – the pink area inside the nail containing blood vessels and nerves – makes many dog owners hesitant to attempt nail trimming at home.
However, regular nail maintenance is crucial for your dog’s health and comfort. Overgrown nails can cause pain, affect your dog’s gait, and even lead to injuries or infections. Learning how to cut dog’s black toenails safely is an essential skill that will benefit both you and your furry companion. With the right approach and understanding of proper techniques, you can master this important aspect of canine care while keeping your dog comfortable and stress-free throughout the process.
Understanding Black Nails and Their Anatomy
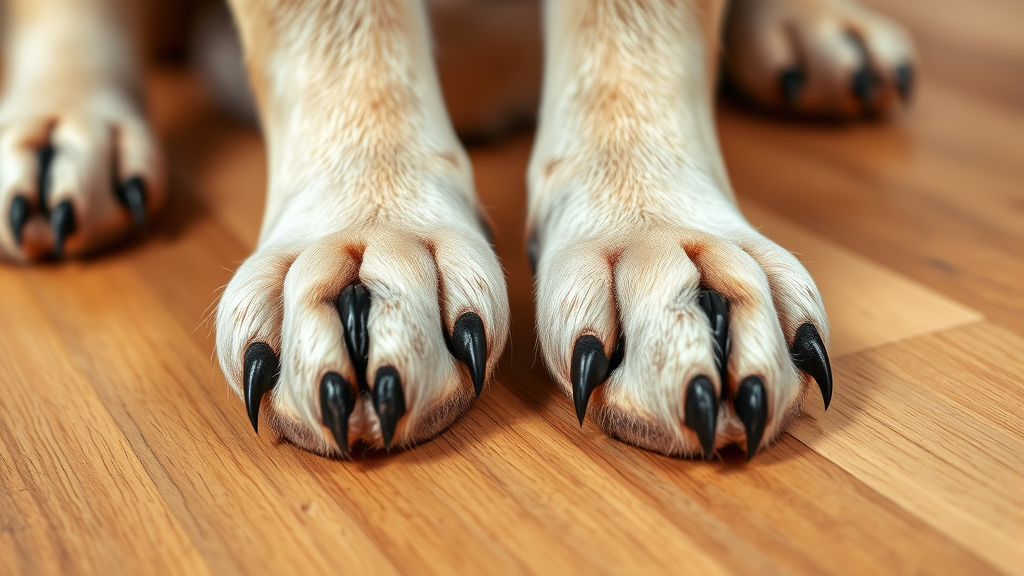
Black toenails in dogs are primarily determined by genetics and pigmentation. The dark coloration extends throughout the entire nail structure, making it impossible to see the quick from the outside. Understanding the anatomy of your dog’s nails is crucial for safe trimming. Each nail consists of the hard outer shell, the softer inner quick containing blood vessels and nerves, and the nail bed where growth occurs.
The quick in black nails extends roughly two-thirds of the way down the nail, but this can vary significantly between individual dogs and even between different nails on the same dog. Factors such as age, activity level, and previous trimming history all influence where the quick ends. Older dogs often have longer quicks due to infrequent trimming, while active dogs who naturally wear down their nails may have shorter quicks.
It’s important to recognize that black nails require a more conservative approach than clear nails. The margin for error is smaller, and you’ll need to rely on tactile feedback and gradual trimming rather than visual cues. This makes the process slower but ultimately safer when done correctly.
Essential Tools for Black Nail Trimming
Having the right tools is fundamental to successfully trimming black nails. High-quality nail clippers designed specifically for dogs are essential – choose between guillotine-style clippers for smaller dogs or scissor-type clippers for larger breeds. The American Kennel Club recommends scissor-type clippers for most dogs as they provide better control and cleaner cuts.
A nail grinder or Dremel tool offers an excellent alternative or supplement to traditional clippers. Grinders allow for gradual nail reduction and help you avoid cutting too much at once. They’re particularly useful for dogs with thick, hard nails or those who are sensitive about having their nails clipped.
Additional essential tools include styptic powder or cornstarch for emergency bleeding control, high-value treats for positive reinforcement, a flashlight or bright lamp for better visibility, and a towel for wrapping anxious dogs. Some owners find nail files helpful for smoothing rough edges after clipping.
Consider investing in a nail trimming hammock or restraint system if your dog is particularly anxious or uncooperative. These tools can make the process safer and less stressful for both you and your pet.
Preparation and Conditioning Techniques
Preparation is key to successful black nail trimming. Start conditioning your dog to nail handling weeks before attempting to trim. Begin by simply touching and holding your dog’s paws during calm moments, gradually increasing the duration and pressure of your touch. Reward calm behavior with treats and praise.
Introduce the nail clippers gradually by letting your dog see and sniff them while providing treats. Practice positioning the clippers near the nails without actually cutting. This desensitization process helps reduce anxiety and creates positive associations with the trimming tools.
Choose an appropriate time and location for nail trimming. Select a quiet, well-lit area where your dog feels comfortable. Avoid attempting nail trims when your dog is excited, stressed, or immediately after meals. Many dogs are calmer after exercise or during their natural rest periods.
Just as regular grooming includes learning how to clean dogs ears, nail trimming should become part of your routine care regimen. Consistency in timing and approach helps your dog develop comfort with the process.
Step-by-Step Trimming Process
Begin the trimming process by securing your dog in a comfortable position. For small dogs, you may hold them in your lap, while larger dogs should be positioned on a non-slip surface. Have an assistant hold your dog if necessary, but ensure the dog doesn’t feel overly restrained, which can increase anxiety.
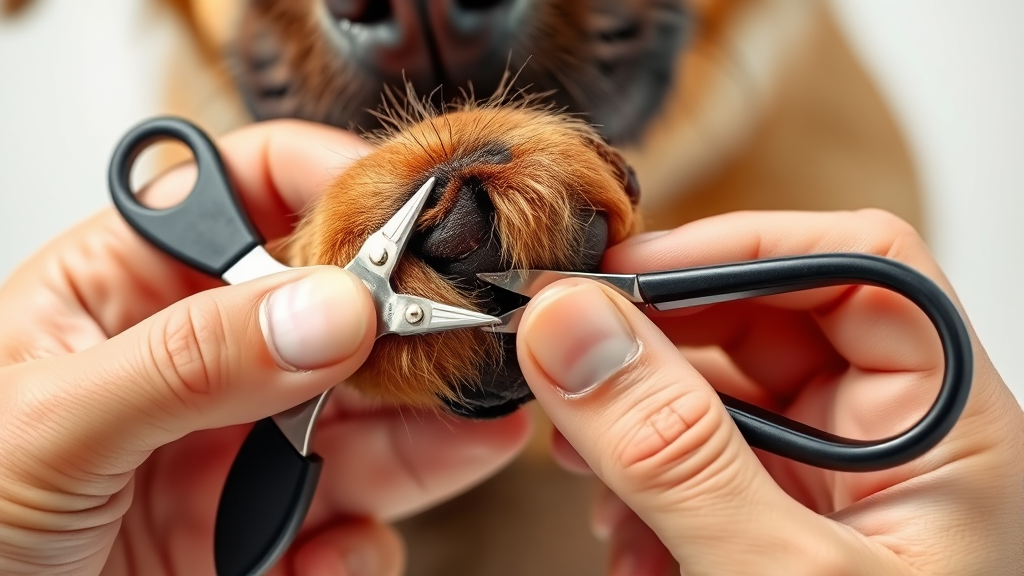
Start with the least sensitive paw, typically a back paw, and work on the nail that extends furthest beyond the pad. Hold the paw firmly but gently, pressing slightly on the pad to extend the nail. Position your clippers at a 45-degree angle to the nail, making cuts perpendicular to the nail’s growth direction.
Make small, gradual cuts rather than attempting to trim the entire nail at once. With black nails, cut only 1-2 millimeters at a time, examining the cut surface after each snip. Look for changes in the nail’s internal structure – you’ll notice the solid outer portion giving way to a softer, potentially moist center as you approach the quick.
The American Veterinary Medical Association emphasizes the importance of stopping immediately if you see any pink or red coloration, feel resistance when cutting, or notice your dog showing signs of discomfort.
Identifying the Quick in Black Nails
Identifying the quick in black nails requires careful observation and a conservative approach. As you make gradual cuts, watch for subtle changes in the nail’s cross-section. The outer portion of the nail appears solid and uniform, while the area near the quick becomes softer and may show a slightly different texture or moisture level.
Use a bright light or flashlight to illuminate the nail from different angles. Sometimes, very thin areas of the nail may show slight translucency that can give you hints about the quick’s location. However, don’t rely solely on visual cues – tactile feedback is often more reliable with black nails.
Pay attention to your dog’s body language throughout the process. Dogs typically show subtle signs of discomfort before you reach the quick, such as tensing their paw, pulling away slightly, or showing facial expressions of concern. These behavioral cues can be more reliable than visual inspection alone.
If you notice a small dark circle or oval shape in the center of the nail’s cross-section after cutting, you’re approaching the quick and should stop trimming that nail. This central area indicates you’re very close to the blood supply and nerve endings.

Safety Measures and Emergency Preparedness
Safety should always be your top priority when trimming black nails. Keep styptic powder or cornstarch readily available to quickly stop bleeding if you accidentally cut the quick. Apply pressure with the powder directly to the bleeding nail tip and maintain pressure for several minutes until bleeding stops.
Never attempt to trim all nails in one session if your dog is anxious or uncooperative. It’s better to trim one or two nails per session and gradually work up to full paw maintenance. This approach reduces stress and maintains positive associations with nail care.
Be prepared to pause or stop the session if your dog becomes overly stressed. Signs of excessive stress include heavy panting, drooling, trembling, or attempts to escape. In these cases, end the session positively with treats and try again later or consider professional grooming services.
Consider having someone assist you, especially during initial attempts. An extra pair of hands can help keep your dog calm and positioned properly while you focus on the technical aspects of nail trimming. Just as you might need assistance when learning how to remove tick from dog, nail trimming can benefit from collaborative effort.
Troubleshooting Common Challenges
Many dogs resist having their feet handled, making nail trimming challenging. If your dog pulls their paws away, practice daily paw handling exercises outside of trimming sessions. Start with brief touches and gradually increase duration, always rewarding calm behavior with treats and praise.
For dogs with extremely thick or hard nails, consider using a nail grinder instead of clippers. Grinders allow for more gradual removal and can be less startling than the sudden pressure of clippers. However, introduce grinders slowly as the noise and vibration can initially frighten some dogs.
If you consistently struggle with nail trimming despite practice, don’t hesitate to seek professional help. Professional groomers and veterinary staff have experience with difficult cases and can provide valuable tips specific to your dog’s needs. They can also demonstrate proper techniques and help you build confidence.
Some dogs benefit from anti-anxiety aids during nail trimming. Consult with your veterinarian about options such as calming supplements, pheromone sprays, or in extreme cases, mild sedation for nail care. The goal is to make the experience as stress-free as possible for both you and your dog.
Maintenance Schedule and Long-term Care
Establishing a regular nail trimming schedule is crucial for maintaining your dog’s paw health and making the process easier over time. Most dogs need nail trims every 3-4 weeks, but this varies based on activity level, age, and individual growth rates. Active dogs who walk on concrete or rough surfaces may need less frequent trims as their nails wear naturally.
Keep a nail trimming log to track when you last trimmed each nail and any observations about quick location or nail growth patterns. This information helps you develop a personalized schedule and approach for your specific dog. Regular maintenance prevents nails from becoming overgrown, which makes trimming more difficult and potentially painful.
Between trimming sessions, monitor your dog’s nails for signs they need attention. Listen for clicking sounds when your dog walks on hard surfaces, which indicates nails are touching the ground and likely need trimming. Also watch for changes in your dog’s gait or signs of discomfort that might indicate nail-related issues.
Incorporate nail health into your overall grooming routine alongside other essential care tasks. Regular maintenance, similar to learning how to heal a dog wound fast at home, becomes easier with consistent practice and proper technique.
Consider seasonal variations in nail growth and trimming needs. Some dogs’ nails grow faster during certain seasons, and outdoor activity levels change throughout the year. Adjust your trimming schedule accordingly and remain flexible based on your dog’s individual needs.
The Humane Society recommends keeping nail care positive and stress-free through consistent routines and patient training approaches. Remember that mastering black nail trimming takes time and practice, but the investment in your dog’s comfort and health is worthwhile.
Frequently Asked Questions
How often should I trim my dog’s black nails?
Most dogs need their nails trimmed every 3-4 weeks, but this can vary based on activity level and individual growth rates. Dogs who walk frequently on concrete or rough surfaces may need less frequent trimming as their nails wear down naturally. Monitor for clicking sounds on hard floors or visible nail length extending beyond the paw pads as indicators it’s time for a trim.
What should I do if I accidentally cut the quick?
If you accidentally cut the quick, remain calm and immediately apply styptic powder or cornstarch to the bleeding nail tip with firm pressure. Hold pressure for several minutes until bleeding stops completely. The nail may be sensitive for a day or two, but serious complications are rare. Contact your veterinarian if bleeding doesn’t stop within 10-15 minutes or if you notice signs of infection.
Can I use human nail clippers on my dog’s black nails?
Human nail clippers are not recommended for dogs as they’re not designed for the thickness and curvature of canine nails. Dog-specific nail clippers provide better leverage, cleaner cuts, and are less likely to split or crush the nail. Invest in proper dog nail clippers – either guillotine or scissor-type depending on your dog’s size and nail thickness.
My dog is terrified of nail trimming. What can I do?
Start with gradual desensitization by handling your dog’s paws daily without trimming, rewarding calm behavior with treats. Introduce nail clippers slowly, letting your dog see and sniff them while providing positive reinforcement. Consider trimming just one nail per session initially, or try using a nail grinder which some dogs find less stressful. If anxiety persists, consult your veterinarian about calming aids or professional grooming services.
How can I tell if I’m getting close to the quick in black nails?
With black nails, look for changes in the nail’s cross-section as you make small cuts. The outer nail appears solid and uniform, while areas near the quick become softer and may show different texture or slight moisture. Watch for a small dark circle or oval shape in the center of the cut surface – this indicates you’re very close to the quick and should stop trimming. Also pay attention to your dog’s body language for signs of discomfort.
Is it better to use nail clippers or a grinder for black nails?
Both tools have advantages for black nails. Clippers provide quick, clean cuts but require more precision since you can’t see the quick. Grinders allow for gradual nail reduction and better control, making them excellent for thick nails or anxious dogs. Many professional groomers recommend starting with clippers to remove bulk, then finishing with a grinder for smoothing. Choose based on your dog’s tolerance and your comfort level with each tool.
What if my dog’s nails are extremely overgrown?
Severely overgrown nails require special attention as the quick likely extends further than normal. Never attempt to cut overgrown nails back to normal length in one session, as this will cause pain and bleeding. Instead, trim small amounts every 1-2 weeks, allowing the quick to gradually recede. For extreme cases, consult a professional groomer or veterinarian who can safely manage the situation and may recommend sedation for the dog’s comfort.