How to Remove Ticks from Dogs: Step-by-Step Guide
Discovering a tick on your beloved dog can be unsettling, but don’t panic! Ticks are common parasites that most dog owners encounter at some point, especially during warmer months. The good news is that with the right knowledge and tools, you can safely remove ticks from your dog and protect them from future infestations. This comprehensive guide will walk you through everything you need to know about tick removal, prevention, and when to seek professional help.
Ticks pose more than just an annoyance—they can transmit serious diseases like Lyme disease, Rocky Mountain spotted fever, and ehrlichiosis. Understanding how to properly remove ticks is essential for your dog’s health and safety. Whether you’re dealing with your first tick or you’re a seasoned pet parent looking to refresh your knowledge, this guide provides practical, evidence-based strategies to help you tackle this common problem effectively.
In this article, we’ll explore everything from identifying ticks to removing them safely, preventing future infestations, and knowing when professional intervention is necessary. Let’s dive into the details so you can confidently protect your furry friend from these persistent parasites.
Identifying Ticks on Your Dog
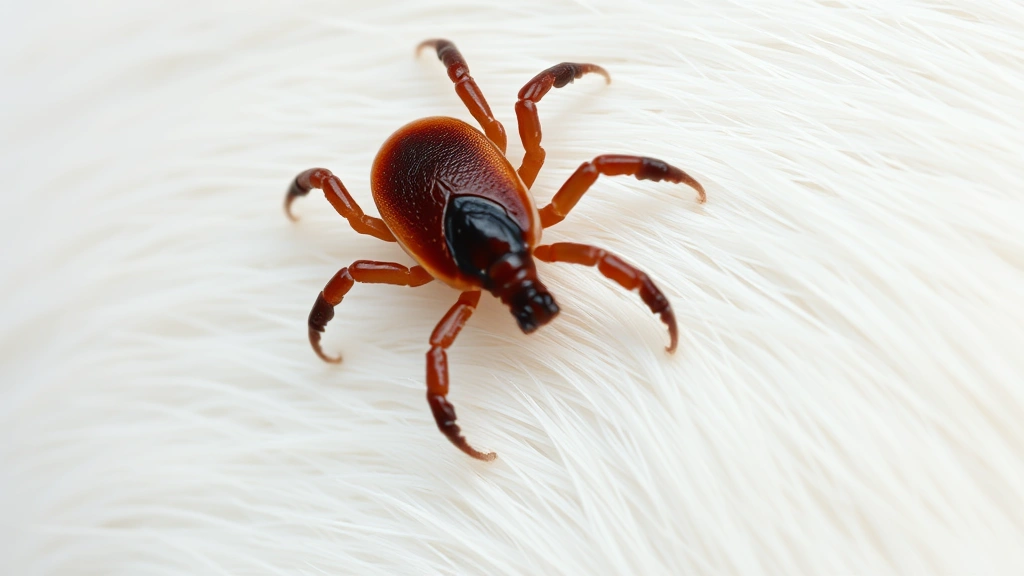
Before you can remove a tick, you need to know what you’re looking for. Ticks vary in appearance depending on their species and whether they’ve recently fed. Unfed ticks are typically small, flat, and brown or reddish in color—often no larger than a sesame seed. Engorged ticks, on the other hand, become much larger, swollen, and grayish in appearance after feeding on your dog’s blood.
Ticks are arachnids with eight legs, which distinguishes them from insects. They have a distinctive oval or tear-drop shape and can be found anywhere on your dog’s body, though they favor warm, moist areas. Common locations include the ears, between the toes, in skin folds, and around the groin area. Understanding what fleas look like on dogs can help you differentiate between these two common parasites, though they require different removal techniques.
Regular grooming and inspection are your first line of defense. Run your hands over your dog’s body, parting the fur to check the skin. Pay special attention to areas where ticks commonly hide. If you find a tick, don’t delay—the sooner you remove it, the lower the risk of disease transmission.
Tools and Supplies You’ll Need
Having the right tools before you begin is crucial for safe and effective tick removal. Here’s what you should gather:
- Fine-tipped tweezers or tick removal tool: These are your primary instruments. Tweezers allow for precise control, while specialized tick removal tools (like tick hooks or tick twisters) can be equally effective.
- Rubbing alcohol or antiseptic: This will help disinfect the area after removal and can be used to clean your tools.
- Small container with lid: Use this to store the tick for identification if needed, or dispose of it safely.
- Gloves: Latex or rubber gloves protect your hands from potential pathogens.
- Gauze or cotton balls: These help with cleaning and applying antiseptic.
- Your dog’s favorite treats: Having rewards on hand helps keep your dog calm during the process.
Never use petroleum jelly, nail polish, or heat to remove ticks, as these methods can cause the tick to release more saliva into your dog—potentially increasing disease transmission risk. Instead, stick with proven removal techniques that veterinarians recommend.
Step-by-Step Tick Removal Process
Now that you’re prepared, let’s walk through the proper tick removal procedure. Following these steps carefully will ensure you remove the entire tick safely:
Step 1: Prepare Your Dog and Workspace
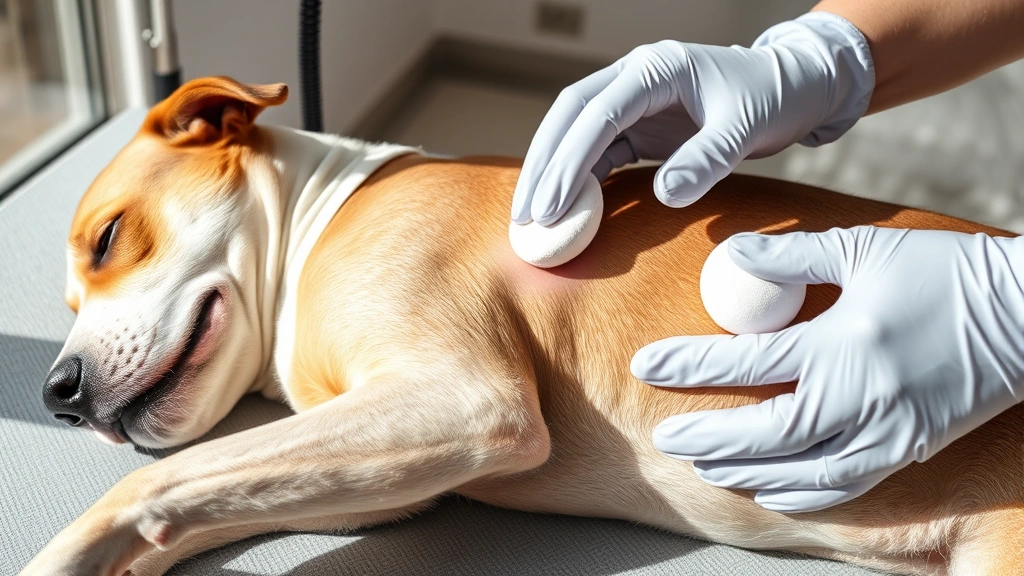
Find a well-lit area where you can comfortably examine your dog. Have all your supplies within arm’s reach. If your dog is anxious, consider having another person help by gently holding or distracting them. Some dogs respond well to being placed on a grooming table or elevated surface.
Step 2: Put on Protective Gloves
Wearing gloves protects you from potential pathogens that ticks may carry. This is an important safety step that shouldn’t be skipped, even though many people do it casually.
Step 3: Grasp the Tick Properly
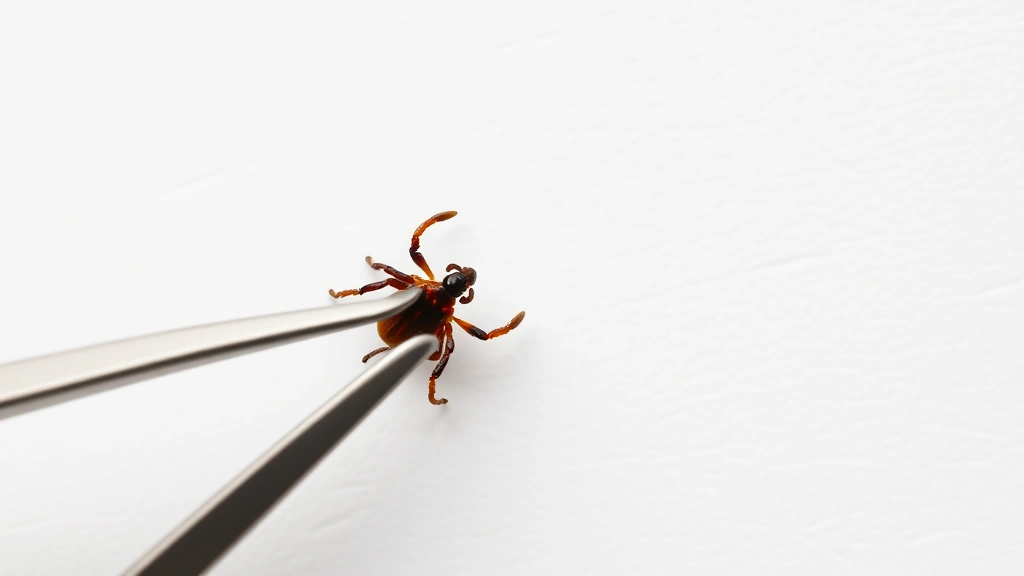
Using your fine-tipped tweezers, grasp the tick as close to your dog’s skin as possible—ideally right at the mouthparts where the tick is attached. Avoid squeezing the tick’s body, as this can cause it to regurgitate infected fluid into your dog. Hold the tweezers steady and apply gentle, even pressure.
Step 4: Pull Straight Out
With steady pressure, pull the tick straight out from the skin. Don’t twist, jerk, or yank suddenly, as this can cause the mouthparts to break off and remain embedded in your dog’s skin. A slow, deliberate extraction is far more effective than a quick pull.
Step 5: Inspect the Tick
Once removed, examine the tick to ensure you’ve extracted the entire body, including the head. If the mouthparts remain in your dog’s skin, don’t panic. Your dog’s immune system will typically expel it naturally, but you can contact your veterinarian if you’re concerned.
Step 6: Dispose of the Tick Safely
Place the tick in a small container with rubbing alcohol to kill it. Alternatively, you can flush it down the toilet, though some experts recommend saving it in a sealed container in case your dog develops symptoms of tick-borne illness. Never crush a tick with your fingers, as this can spread pathogens.
Step 7: Clean the Bite Area
Use rubbing alcohol or an antiseptic wipe to clean the area where the tick was attached. This reduces the risk of infection. If your dog has minor irritation, you can apply a small amount of antibiotic ointment.
Common Mistakes to Avoid
Understanding what NOT to do is just as important as knowing the correct removal technique. Here are common mistakes that can make the situation worse:
- Don’t use heat: Lighting a match or cigarette near a tick doesn’t cause it to back out. Instead, it stresses the tick and can cause it to inject more saliva into your dog.
- Don’t apply petroleum jelly or nail polish: These suffocation methods are ineffective and outdated. They don’t remove the tick and may increase disease transmission.
- Don’t squeeze the tick’s body: Applying pressure to the engorged abdomen forces infected fluid into your dog’s bloodstream, increasing disease risk significantly.
- Don’t twist or jerk suddenly: Aggressive removal can break off the mouthparts, leaving them embedded in your dog’s skin.
- Don’t use your bare hands: Always wear gloves to protect yourself from potential pathogens the tick may carry.
- Don’t delay removal: The longer a tick feeds, the higher the risk of disease transmission. Remove ticks promptly when discovered.
When learning how to remove a tick from your dog, it’s critical to avoid these common pitfalls. Your veterinarian can provide additional guidance if you’re unsure about any step in the process.
Post-Removal Care and Safety
Tick removal doesn’t end once the parasite is gone. Proper aftercare ensures your dog remains healthy and free from complications:
Monitor the Bite Area
Keep an eye on the spot where the tick was attached for the next few days. Some mild redness or swelling is normal, but excessive inflammation, discharge, or signs of infection warrant a veterinary visit. If your dog is excessively licking or chewing at the area, consider using an Elizabethan collar to prevent further irritation.
Watch for Disease Symptoms
Tick-borne diseases don’t always appear immediately. Monitor your dog for symptoms like letharness, fever, loss of appetite, limping, or swollen joints. These symptoms can appear days or even weeks after a tick bite. According to the American Kennel Club’s guide on tick-borne diseases, early detection of symptoms can lead to more effective treatment.
Clean Your Tools
After removal, clean your tweezers or tick removal tool with rubbing alcohol and allow them to dry completely. This prevents cross-contamination if you need to remove additional ticks.
Maintain Good Hygiene
Wash your hands thoroughly after removing a tick, even though you wore gloves. This is a simple but important precaution against potential pathogens.
Prevention Strategies
The best approach to tick problems is prevention. Understanding how dogs get fleas can also inform your prevention strategy, as many prevention methods work against both parasites. Here are effective prevention methods:
Topical Tick Preventatives
Monthly topical treatments applied to your dog’s skin are highly effective at preventing ticks. Products containing fipronil, permethrin, or other active ingredients kill ticks on contact. Your veterinarian can recommend the best option based on your dog’s age, weight, and health status.
Oral Tick Preventatives
Prescription oral medications like Simparica and Bravecto provide systemic tick protection. These are convenient for dogs that resist topical treatments and offer reliable, long-lasting protection.
Tick Collars
Modern tick collars release gas that repels ticks and fleas. While less messy than topical treatments, they may not be suitable for all dogs, particularly those with sensitive skin.
Environmental Control
Reduce tick habitats around your home by keeping grass trimmed, removing leaf litter, and clearing brush. Ticks thrive in tall grass and wooded areas, so maintaining your yard reduces exposure risk.
Regular Grooming and Inspection
Brush your dog regularly and perform weekly tick checks, especially during peak season (spring through fall). Early detection makes removal easier and reduces disease transmission risk. This is also a good time to learn how to clean your dog’s ears, as ticks often hide in these areas.
Limit Exposure
Avoid walking your dog in tall grass, dense brush, or wooded areas during peak tick season if possible. When you do venture into these areas, check your dog thoroughly afterward.
The ASPCA provides comprehensive information on flea and tick prevention, which can help you develop a complete protection strategy for your dog.
When to Call Your Veterinarian
While most ticks can be removed at home safely, certain situations warrant professional veterinary care:
- Multiple ticks: If your dog has numerous ticks, your veterinarian can remove them efficiently and recommend preventative treatment.
- Tick stuck in skin: If the mouthparts remain embedded after removal, your vet can safely extract them.
- Signs of infection: Excessive swelling, discharge, or signs of skin infection require professional attention.
- Disease symptoms: If your dog develops symptoms like fever, letharness, or limping within weeks of tick exposure, contact your veterinarian immediately.
- Embedded ticks near eyes or genitals: Ticks in sensitive areas are best removed by professionals to avoid injury.
- Your dog is pregnant or very young: Certain removal methods may not be appropriate for pregnant dogs or puppies under 8 weeks old.
Your veterinarian can also provide detailed guidance on removing ticks from dogs and recommend the best prevention strategy for your specific dog. Additionally, if you notice your dog scratching excessively, understanding whether dogs can get lice may help you identify other parasitic issues.
According to UC Davis School of Veterinary Medicine’s tick management resources, professional assessment is valuable for dogs with tick-borne disease symptoms or complications from tick bites.
Frequently Asked Questions
What should I do if I find a tick on my dog?
Remain calm and gather your supplies: fine-tipped tweezers, gloves, rubbing alcohol, and a small container. Follow the step-by-step removal process outlined above, grasping the tick close to the skin and pulling straight out with steady pressure. Never squeeze the tick’s body or use heat, petroleum jelly, or nail polish.
Can I catch a disease from a tick?
While rare, it’s possible to contract tick-borne illnesses from infected ticks. Always wear gloves when removing ticks, avoid crushing them, and wash your hands afterward. Most tick-borne diseases are more common in dogs than humans, but taking precautions is wise.
How long does it take for a tick to transmit disease?
Disease transmission typically requires the tick to feed for 24-48 hours, though some diseases can be transmitted more quickly. This is why prompt removal is crucial. According to CDC tick information, early removal significantly reduces disease transmission risk.
What if the tick’s head breaks off inside my dog?
If the mouthparts remain in your dog’s skin, don’t panic. Your dog’s immune system will typically expel it naturally within a few weeks. However, contact your veterinarian if the area becomes infected or if you’re concerned. Avoid digging at the site, as this can cause infection.
Are all ticks dangerous?
Not all ticks carry diseases, but many species can transmit serious illnesses like Lyme disease, Rocky Mountain spotted fever, and ehrlichiosis. Since you can’t determine if a tick is infected by looking at it, treat all ticks as potentially dangerous and remove them promptly.
How often should I check my dog for ticks?
During peak tick season (spring through fall), check your dog at least weekly, preferably after outdoor activities. In winter or areas with fewer ticks, monthly checks are usually sufficient. Dogs that spend significant time outdoors may need more frequent checks.
Can I use a preventative medication instead of removing ticks?
Yes! Preventative medications are highly effective at preventing tick infestations. However, they don’t prevent ticks from initially attaching to your dog. If you find a tick despite using preventatives, remove it using the proper technique. Preventatives work best when combined with regular inspection and environmental control.
Is it safe to use tick removal tools instead of tweezers?
Absolutely! Specialized tick removal tools like tick hooks or tick twisters are designed specifically for tick removal and work just as well as tweezers. Follow the manufacturer’s instructions carefully, as the removal technique may differ slightly from tweezers.