How to Use Rolling Dog Drywall Sanders: Expert Tips for Perfect Finishing
If you’re tackling a home renovation project and wondering about rolling dog drywall sanders, you’ve come to the right place! This specialized tool has become increasingly popular among DIY enthusiasts and professional contractors alike. But here’s the thing—while the name might sound intimidating, mastering this equipment is entirely achievable with the right guidance and a bit of practice.
A rolling dog drywall sander is essentially a motorized sanding tool designed to smooth out drywall joints and imperfections with minimal dust and maximum efficiency. The name comes from the tool’s cylindrical sanding head that rotates like a drum, creating even pressure across your wall surface. Whether you’re prepping walls for painting, fixing previous repair work, or starting from scratch on a new construction project, understanding how to use this equipment properly will save you time, money, and frustration.
In this comprehensive guide, we’ll walk you through everything you need to know about operating a rolling dog drywall sander, from setup and safety considerations to advanced techniques that professionals use. We’ll also explore how proper wall preparation connects to other essential home maintenance tasks, and why investing time in learning this skill pays dividends for any homeowner.
What Is a Rolling Dog Drywall Sander?
The rolling dog drywall sander is a specialized power tool that revolutionized the drywall finishing process. Unlike traditional hand sanding or orbital sanders, this equipment features a long handle with a rotating cylindrical head that glides across your wall surface. The design allows you to sand large areas quickly and uniformly, which is particularly valuable when you’re working on expansive wall sections or multiple rooms.
The primary components include a motor that powers the rotating drum, an adjustable handle system for ergonomic control, and a collection system that captures dust during operation. Most modern versions are equipped with variable speed controls, allowing you to adjust the sanding intensity based on your specific needs. This adaptability makes the tool suitable for various drywall conditions, from light touch-ups to more aggressive material removal.
Understanding the mechanics of this tool is essential for achieving professional results. The rotating drum creates consistent contact pressure, which means you won’t end up with the uneven surfaces that sometimes occur with hand sanding. This consistency is particularly important when you’re preparing walls for painting or wallpaper application, where surface imperfections become glaringly obvious under certain lighting conditions.
Safety Considerations Before You Start
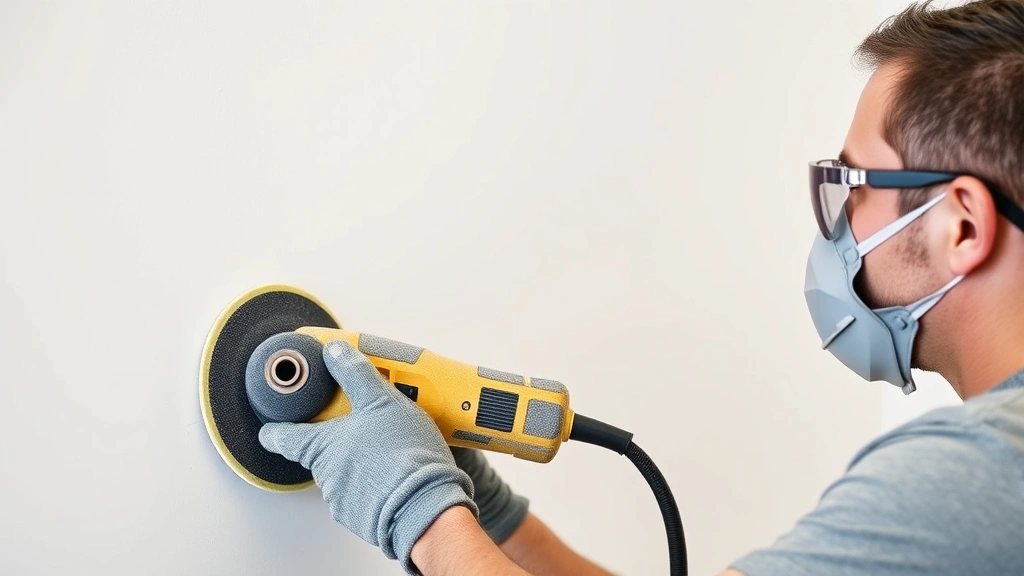
Before you even think about plugging in your rolling dog drywall sander, safety must be your top priority. Drywall dust contains silica particles, which can cause serious respiratory issues if inhaled over extended periods. This is why proper personal protective equipment is non-negotiable when working with this equipment.
Start by investing in a high-quality dust mask rated for silica particles—ideally a P100 or HEPA-filter mask. Regular paper masks simply won’t cut it for this application. Additionally, wear safety glasses to protect your eyes from dust particles and debris. Long sleeves and long pants provide an extra layer of protection, and consider wearing gloves to protect your hands from the rough sanding surface and to maintain better grip control.
Ensure your work area is properly ventilated. Open windows and doors to create cross-ventilation, and consider using a portable air scrubber or HEPA-filter fan to capture airborne particles. If you’re working in a confined space, this step becomes even more critical. Check your electrical setup too—use a properly grounded outlet and never operate the tool with wet hands or in damp conditions.
The tool itself can be heavy and requires proper handling to avoid strain injuries. Make sure you’re physically prepared for the work, and don’t hesitate to take breaks. Fatigue can lead to accidents and poor technique, so listen to your body and rest when needed. This mindset applies to other maintenance tasks as well—whether you’re learning about proper how to groom a dog or performing home repairs, safety and proper technique matter equally.
Setup and Preparation Steps
Proper setup is crucial for successful drywall sanding. Begin by inspecting your walls carefully and identifying all areas that need attention. Look for joint ridges, tape imperfections, nail pops, and any rough spots that require smoothing. Mark these areas lightly with a pencil so you won’t forget them during the sanding process.
Next, prepare your workspace by moving furniture away from the walls and covering anything you want to protect from dust. Use drop cloths or plastic sheeting to protect flooring and any remaining items in the room. Close interior doors to contain the dust, and consider sealing door frames with plastic sheeting and tape for maximum containment.
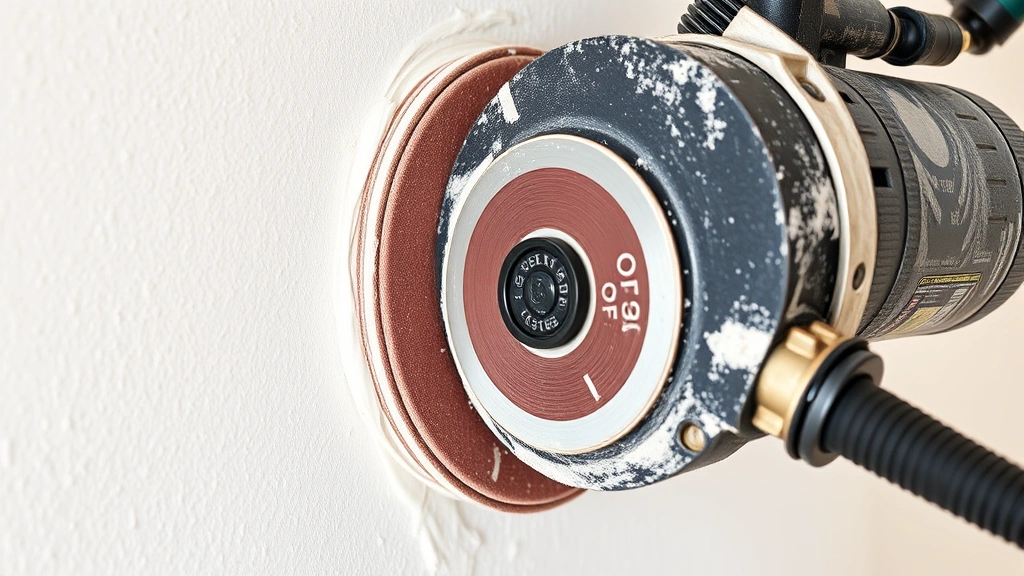
Assemble your rolling dog sander according to the manufacturer’s instructions. Attach the appropriate sanding screen or grit to the drum—typically you’ll start with a coarser grit for initial smoothing and progress to finer grits for finishing work. Make sure all connections are secure and the sanding surface is properly aligned. Check that the dust collection system is properly attached and functioning.
Fill your dust collection bag or connect to an external vacuum system. A full dust bag significantly reduces the tool’s effectiveness, so starting with an empty collection system is essential. If you’re using an external vacuum, ensure it’s also equipped with a HEPA filter to handle the fine silica particles effectively.
Test the tool on a small, inconspicuous area first. This allows you to get a feel for the equipment’s weight, balance, and sanding pressure. You’ll quickly develop an intuition for how much downward pressure to apply and how quickly to move the tool across the surface. This practice run is invaluable for building confidence before tackling larger areas.
Operating Technique and Best Practices
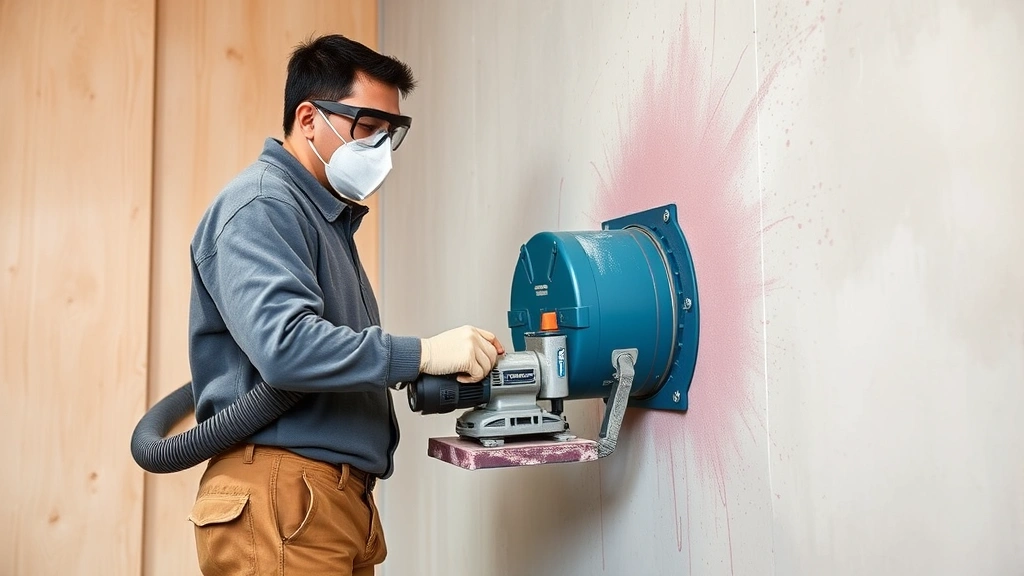
Now comes the actual sanding work. Start by positioning yourself comfortably with the tool. The rolling dog sander should be held with both hands, maintaining a firm but not overly tight grip. Your posture matters—stand with your feet shoulder-width apart and keep your back relatively straight to avoid strain during extended use.
Begin sanding with smooth, overlapping passes across the wall surface. Move the tool in a consistent pattern—either horizontal or vertical passes work well, but maintain consistency throughout the wall. Avoid circular motions or erratic movements, as these tend to create visible swirl marks and uneven surfaces. The goal is to create uniform contact across the entire wall area.
Apply moderate, even pressure throughout your passes. Don’t press down hard thinking it will speed up the process—excessive pressure can create divots and uneven surfaces while actually slowing your progress. Let the tool do the work. Most professionals use a technique where they maintain just enough downward pressure to keep the drum in contact with the wall while allowing the motor to power the actual sanding action.
Pay special attention to drywall joints and taped areas. These sections often require slightly more attention, but avoid over-sanding any single spot. Multiple light passes over problem areas work better than aggressive single passes. This approach gives you better control and reduces the risk of creating low spots or visible depressions.
When you’re sanding ceiling areas, work in manageable sections to avoid excessive overhead fatigue. Some professionals use extension poles or ceiling-specific sanders for overhead work, which can significantly reduce strain. The same principle applies to any detailed finishing work—proper tools and techniques matter tremendously, just as they do when you’re how to bathe a dog or performing other precision tasks that benefit from the right approach.
Progress through your grit sequence methodically. After completing your initial pass with a coarser grit, vacuum or wipe down the wall to see your progress clearly. Then switch to a finer grit for subsequent passes. This progression—typically moving from 80-grit to 120-grit to 150-grit or higher—creates a progressively smoother surface. Each pass should require less pressure and fewer overlapping movements than the previous one.
Dust Management and Cleanup
Drywall dust is incredibly fine and pervasive. Even with excellent collection systems, some dust will escape into your workspace. Active dust management during the sanding process is essential. Periodically stop and wipe down surfaces with a damp cloth to prevent dust from settling everywhere in your home.
Empty your dust collection bag frequently—don’t wait until it’s completely full. A partially full bag actually performs better than a completely full one, maintaining better suction and collection efficiency. If you’re using an external vacuum system, check the filter regularly and clean or replace it as needed to maintain proper airflow.
After completing your sanding work, turn off the tool and allow dust to settle for 15-20 minutes before removing any containment barriers. This settling time significantly reduces the amount of dust that escapes into other areas of your home. Then carefully remove plastic sheeting and drop cloths, folding them inward to contain any dust that might be clinging to them.
Use a HEPA-filter vacuum to clean all surfaces in the work area, including walls, baseboards, windowsills, and flooring. Wipe down surfaces with damp cloths rather than dry dusting, which can resuspend fine particles. Pay special attention to areas outside your immediate work zone, as drywall dust travels easily through air currents.
The cleanup process is thorough but manageable with the right approach. Think of it similarly to how you’d clean up after bathing your pet—how to dry a dog after bath involves careful attention to moisture and cleanliness, just as drywall dust cleanup requires systematic attention to containing and removing fine particles.
Common Problems and Solutions
Even with proper technique, you might encounter challenges when using a rolling dog drywall sander. Understanding common issues and their solutions helps you troubleshoot effectively and maintain quality results.
Problem: Uneven Surface or Visible Swirl Marks
This typically results from inconsistent pressure or circular sanding motions. Solution: Maintain steady, overlapping passes in one direction. Check that you’re applying even pressure throughout each pass. If marks persist, switch to a finer grit and make additional passes with lighter pressure.
Problem: Deep Grooves or Divots
Over-sanding specific areas causes these problems. Solution: Avoid dwelling too long in any single spot. Make multiple light passes rather than aggressive single passes. If you’ve already created divots, use joint compound to fill them, let it dry completely, and sand smooth with fine grit.
Problem: Dust Collection System Not Working Effectively
Poor suction usually indicates a full bag or clogged filter. Solution: Empty the dust collection bag and clean or replace the filter. Check all connections to ensure they’re secure and airtight. If problems persist, the motor or fan might need service.
Problem: Sanding Screen Clogging Quickly
Rapid clogging typically means you’re working on damp drywall or joint compound that hasn’t fully cured. Solution: Allow joint compound to cure fully before sanding—typically 24 hours per layer. Ensure your work area is dry. If the screen does clog, gently tap it against a hard surface to dislodge dust, or use a specialized screen cleaning brush.
Problem: Tool Feels Unbalanced or Difficult to Control
This could indicate improper assembly or an unbalanced sanding drum. Solution: Verify all components are properly assembled according to instructions. Check that the sanding screen is evenly attached without wrinkles or bunching. Ensure the tool is held properly with both hands and positioned at the correct angle to the wall.
Tool Maintenance and Care
Proper maintenance extends your rolling dog sander’s lifespan and ensures consistent performance. After each use, empty the dust collection system completely. Don’t leave dust sitting in the bag, as it can compact and make future collection less effective.
Clean or replace the sanding screen regularly. Even screens that aren’t completely worn can lose effectiveness if they’re clogged with dust. A clean screen makes a noticeable difference in sanding quality and reduces strain on the motor. Most screens can be gently cleaned by tapping them or using a specialized brush, but replacement screens are relatively inexpensive and sometimes the better option.
Inspect the drum itself for damage or uneven wear. A damaged drum creates inconsistent sanding results and can be difficult or impossible to correct. If you notice deep gouges, cracks, or significant wear patterns, the drum may need replacement.
Check all electrical connections and the power cord regularly for damage. Never use a tool with a damaged power cord. Store your rolling dog sander in a dry location away from extreme temperatures. Moisture and temperature fluctuations can affect the motor and electrical components.
Lubricate moving parts according to the manufacturer’s recommendations. Some models have specific lubrication requirements for the motor bearings or handle joints. Following these guidelines prevents premature wear and keeps the tool operating smoothly. Regular maintenance also applies to other equipment and even to pet care—just as how to clean dogs ears requires regular attention and proper technique, your tools deserve consistent care.
Keep the user manual accessible and refer to it periodically. Manufacturers sometimes provide specific maintenance schedules or recommendations that you might forget over time. Following these guidelines helps you avoid common mistakes that lead to premature tool failure.
Frequently Asked Questions
How long does it take to sand a typical room?
The time depends on room size, wall condition, and your experience level. A moderately-sized bedroom with light to moderate wall imperfections typically takes 4-8 hours, including setup and cleanup. Larger rooms or heavily damaged walls may require 12+ hours. First-time users should expect longer timelines as they develop proficiency.
Can I use a rolling dog drywall sander on textured walls?
It’s possible but challenging. Textured surfaces create uneven contact points for the sanding drum. If you’re trying to smooth textured walls, you might be better served by hand sanding or other methods. For light texture removal, start with coarser grit and make multiple passes, but be prepared for inconsistent results.
What’s the difference between rolling dog sanders and other drywall sanders?
Rolling dog sanders excel at smoothing large, relatively flat wall areas efficiently. Orbital sanders work better for detail work and smaller areas. Hand sanding provides maximum control but requires significantly more effort. For whole-room finishing, rolling dog sanders are typically the most efficient choice. For more information on finishing techniques, consult resources like the Gypsum Association.
Should I sand before or after priming?
Always sand before priming. Your final sanding pass should be with fine grit—typically 150-180—to create a smooth surface for primer adhesion. After priming, you might do light sanding with very fine grit if needed, but the bulk of your sanding work happens before any finishing products are applied.
Can I rent a rolling dog drywall sander instead of buying?
Absolutely. Renting is an excellent option if you only have occasional projects. Most tool rental shops offer daily, weekly, and monthly rental options at reasonable rates. Renting allows you to access professional-quality equipment without the significant purchase investment. Factor in dust collection equipment rental as well if your tool doesn’t include it.
What grit should I use for different wall conditions?
Use 80-120 grit for initial smoothing and joint compound leveling. Progress to 120-150 grit for intermediate smoothing and blending. Finish with 150-220 grit for final preparation before priming. For light touch-ups, you might start directly with 120-150 grit. Always work from coarser to finer grits for best results.
How do I prevent dust from spreading to other rooms?
Seal doorways with plastic sheeting and tape. Keep interior doors closed. Use negative air pressure if possible—an exhaust fan pulling air out of the room helps contain dust. Run a HEPA-filter air scrubber in the work area. These measures combined significantly reduce dust migration to adjacent spaces.
Is professional drywall sanding worth the cost?
For large projects or if you’re uncomfortable with the work, professional services may be worthwhile. Professionals complete jobs faster and often achieve superior results. However, for homeowners comfortable with DIY projects and moderate-sized rooms, renting equipment and doing the work yourself can save considerable money. The learning curve isn’t steep, and the satisfaction of completing the work yourself is rewarding.