How to Collapse a Dog Crate: Step-by-Step Guide
If you’re a dog owner, you’ve probably discovered that dog crates are amazing tools for training, travel, and keeping your furry friend safe. But here’s the thing nobody tells you: all that convenience comes with a storage challenge. When you’re not using your crate, it takes up about as much space as a small piece of furniture, which can be frustrating in apartments or homes where square footage is precious.
The good news? Most modern dog crates are designed to collapse for easy storage and portability. Whether you need to pack it for a road trip, store it in your garage, or simply clear out your living room, learning how to properly collapse your dog crate is a game-changer. In this comprehensive guide, we’ll walk you through everything you need to know about collapsing different types of dog crates, plus some pro tips to make the process smooth and hassle-free.
Collapsing a dog crate isn’t just about saving space—it’s also about maintaining the integrity of your crate so it lasts for years to come. Let’s dive into the details and get your crate storage situation sorted!
Types of Dog Crates and Their Collapsibility
Before we get into the nitty-gritty of collapsing your crate, it’s important to understand that not all dog crates are created equal. Different materials and designs require different approaches, and knowing which type you have is the first step to successfully collapsing it.
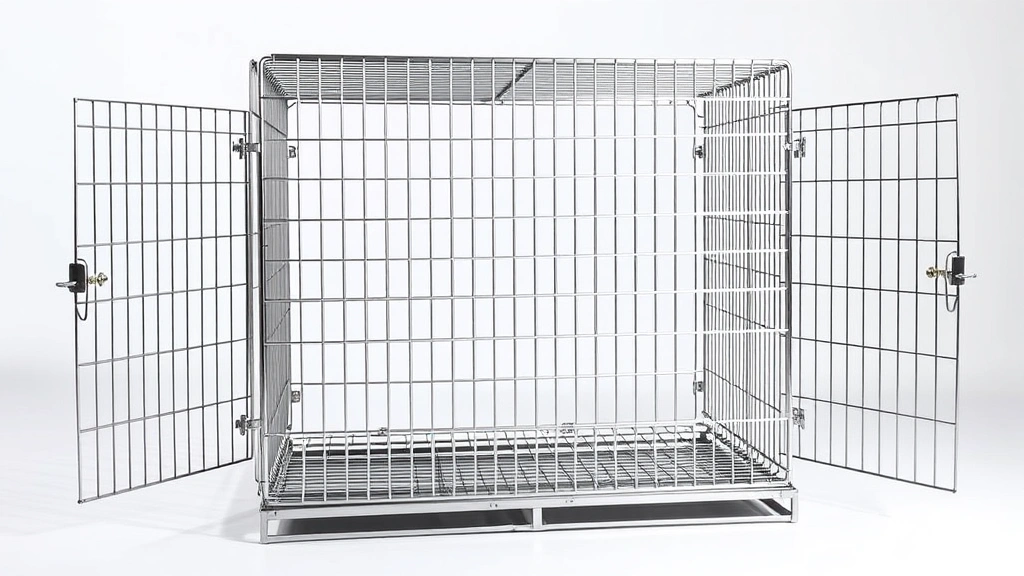
Metal wire crates are by far the most popular option among dog owners. They’re durable, provide excellent ventilation, and are incredibly easy to collapse. These crates feature a rectangular frame made from metal bars connected by hinges, making them ideal for space-saving storage.
Plastic crates are another common choice, especially for air travel and smaller dogs. They’re sturdy and provide a den-like environment that many dogs find comforting. The good news is that most plastic crates are designed to collapse, though the process differs slightly from metal crates.
Fabric and soft-sided crates have become increasingly popular because they’re lightweight and portable. These are typically the easiest to collapse since they often feature a pop-up design or simple frame mechanism.
Understanding how to crate train an adult dog is essential before you even think about storage, but once your pup is comfortable with their crate, knowing how to collapse it becomes practical knowledge every owner needs.
How to Collapse Metal Wire Crates
Metal wire crates are the most straightforward to collapse, which is probably why they’re so popular. The process typically takes just a few minutes once you understand the mechanism.
Step 1: Remove All Bedding and Accessories
Start by removing everything inside the crate—bedding, toys, water bowls, and any other items. This makes the crate lighter and prevents anything from getting damaged during the collapse process. It’s also a good time to give your crate a quick inspection for any damage.
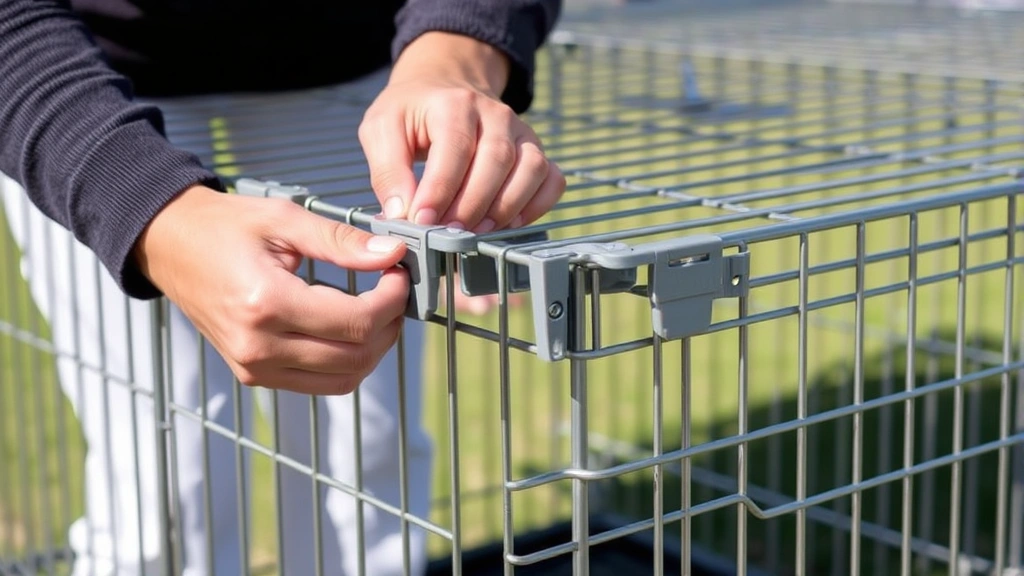
Step 2: Locate the Side Latches or Clips
Look at the sides of the crate. Most metal crates have plastic or metal latches or clips on the left and right sides. These are what hold the crate in its expanded position. On some models, you might find slide-lock mechanisms instead of clips.
Step 3: Release the Side Latches
Gently press or lift the latches to unlock them. You might need to apply a bit of pressure, but they should release without excessive force. If a latch seems stuck, try wiggling it gently or applying a small amount of lubricant like WD-40. Don’t force it, as you could damage the mechanism.
Step 4: Fold the Sides Inward
Once the latches are released, the sides of the crate will fold inward. Gently push the sides toward the center. Most metal crates fold in a specific pattern—usually the sides collapse first, followed by the ends.
Step 5: Fold the Front and Back
After the sides are folded, fold the front and back panels inward. They should fold flat against each other. Some crates have a top that also folds down, so make sure to collapse that as well.
Step 6: Secure the Collapsed Crate
Once fully collapsed, the crate should be relatively compact. Some models come with straps or fasteners that keep the collapsed crate together. If yours doesn’t, you might want to use a bungee cord or storage strap to keep it from accidentally expanding during storage or transport.
Pro tip: If you’re planning to travel frequently, you might want to invest in a crate with a carrying bag. Many manufacturers sell these separately, and they make transport incredibly convenient.
How to Collapse Plastic Dog Crates
Plastic crates, often called “airline crates” or “travel crates,” collapse differently than metal ones. They’re typically made of a hard plastic shell divided into two halves.
Step 1: Empty the Crate Completely
Just like with metal crates, remove all bedding, toys, and accessories. This gives you a clear view of the crate’s structure and makes it easier to handle.
Step 2: Locate the Fastening Mechanisms
Plastic crates are usually held together by plastic latches, bolts, or screws on the sides and sometimes on the top and bottom. Examine your specific model to identify how it’s fastened.
Step 3: Unfasten the Latches or Remove Fasteners
If your crate has plastic latches, press them down or slide them to release. If it uses bolts or screws, you’ll need the appropriate tools—usually a Phillips or flathead screwdriver, or possibly an Allen wrench. Keep all fasteners in a safe place; you’ll need them when you reassemble the crate.
Step 4: Separate the Two Halves
Once all fasteners are removed, gently pull the two halves of the crate apart. Be careful not to force them, as the plastic can crack if you’re too aggressive. The halves should separate relatively easily once all fasteners are undone.
Step 5: Stack and Store
Once separated, stack the two halves together. They should fit relatively flat, making them ideal for under-bed storage or in a closet. If you want extra protection, wrap them in a blanket or place them in a storage bag.
When you’re ready to use your plastic crate again, simply reverse these steps. Make sure all fasteners are tightened securely before putting your dog inside.
How to Collapse Fabric and Soft-Sided Crates
Fabric crates are a dream when it comes to collapsing. They’re designed with portability in mind, and most can be folded down to a fraction of their original size.
Step 1: Remove All Items from Inside
Clear out bedding, toys, and any accessories. This makes the crate lighter and easier to manipulate.
Step 2: Identify the Frame Type
Most fabric crates use one of two frame types: a flexible wire frame or a collapsible metal pole frame. Understanding which type yours has will help you collapse it correctly.
Step 3: Collapse the Frame (Wire Frame Type)
If your crate has a flexible wire frame, you’ll typically push or pull the frame inward to collapse it. The frame should fold in on itself, creating a flat or disk-like shape. Some models require you to collapse it from the top, while others collapse from the sides.
Step 4: Collapse the Frame (Pole Frame Type)
If your crate has removable metal poles, you’ll need to remove them one at a time and store them separately. The fabric sides should then fold flat. This type is great because it takes up minimal space once fully collapsed.
Step 5: Roll or Fold the Fabric
Once the frame is collapsed or removed, roll or fold the fabric inward. Many fabric crates come with a carrying bag specifically designed for this purpose. If yours didn’t, a large storage bag or duffel bag works great.
Fabric crates are perfect for people who frequently travel with their dogs or who need to quickly store their crate. They’re also ideal if you’re learning how to crate train an older dog and want flexibility in your setup.

Preparation and Safety Tips
Before you collapse your dog crate, there are several important preparation steps and safety considerations to keep in mind.
Clean Your Crate First
Before storing your crate, give it a thorough cleaning. Use a pet-safe cleaner to wipe down all surfaces, especially if your dog had any accidents inside. This prevents odors and bacteria from developing during storage and keeps your crate fresh and hygienic.
Inspect for Damage
While cleaning, inspect your crate for any damage—bent bars, cracked plastic, torn fabric, or missing fasteners. Address any issues now rather than discovering them later when you need to use the crate again. Small problems can become big ones if left unattended.
Ensure Your Dog Is Comfortable
If you’re collapsing the crate while your dog is still getting used to it, make sure this doesn’t create anxiety. Your pup should understand that the crate isn’t disappearing forever. Once you’ve mastered the basics of crate training your adult dog, they’ll understand that the crate is a safe space whether it’s set up or stored away.
Gather Your Tools
Before you start, gather any tools you might need—screwdrivers, Allen wrenches, or whatever your specific crate requires. Having everything ready makes the process faster and less frustrating.
Work in a Clear Space
Collapse your crate in an open area where you have plenty of room to work. This prevents accidents and makes it easier to handle all the panels and parts.
Use Proper Lifting Techniques
Even though crates aren’t usually heavy, use proper lifting techniques to protect your back. Bend at your knees, not your waist, and ask for help if you need it.
Storage Solutions After Collapsing
Once your crate is collapsed, you need a good storage solution to keep it protected and organized.
Under-Bed Storage
Collapsed crates fit perfectly under most beds, making this an ideal storage location if you don’t have much extra space. Just make sure the area is dry and clean.
Closet Storage
Closets are another great option, especially if you can hang the crate or stack it neatly. Make sure it’s not in a damp environment where mold or mildew could develop.
Garage or Basement
If you have garage or basement space, these areas work well for long-term storage. Just ensure the environment isn’t too hot, cold, or humid, as extreme conditions can damage the crate material.
Storage Bags and Containers
Invest in a sturdy storage bag or container to protect your crate from dust and damage. Many crate manufacturers sell purpose-designed bags, but any large storage container will work.
Label Your Storage
If you have multiple pets or crates, label your storage so you know exactly what size and type of crate you’re storing. This saves time when you need to set it up again.
Proper storage also ties into overall dog care, as maintaining your equipment ensures your pup always has safe, clean spaces to rest and relax.
Troubleshooting Common Issues
Latches Won’t Release
If your metal crate latches seem stuck, try applying a small amount of silicone-based lubricant to the mechanism. Let it sit for a minute, then try again. Avoid forcing the latch, as this could cause permanent damage. If it remains stuck after lubrication, you might need to contact the manufacturer or consider replacing the latch mechanism.
Plastic Crate Won’t Separate
Make sure you’ve removed all fasteners. Sometimes one overlooked bolt can prevent the two halves from separating. Double-check all sides, top, and bottom. If you’ve confirmed all fasteners are removed and it still won’t budge, try gently tapping the seam with a rubber mallet to loosen any stuck plastic.
Fabric Crate Frame Won’t Collapse
If your fabric crate’s frame won’t collapse, check for any items stuck inside that might be preventing it. Also, examine the frame for any bends or damage that could cause misalignment. If the frame is damaged, you might need to replace it or contact the manufacturer.
Crate Expands During Storage
If your collapsed crate keeps expanding, use storage straps or bungee cords to keep it compressed. This is especially common with metal crates that have spring-loaded mechanisms. A storage bag designed for your crate type is also an excellent solution.
Missing Parts After Storage
To prevent losing small parts like bolts or clips, store them in a labeled plastic bag and tape it to the inside of your crate or storage container. This keeps everything together and makes reassembly much easier.
Understanding how to properly collapse your crate is related to understanding your dog’s overall comfort. Just as you’d want to know how to put a harness on a dog correctly for their safety, knowing proper crate care ensures their space is always ready for them.
Frequently Asked Questions
Can I collapse my dog crate while my dog is inside?
Absolutely not. Never attempt to collapse a crate with your dog inside. Always remove your dog and ensure they’re in a safe location before collapsing their crate. This prevents injury and keeps your pup from becoming anxious about their safe space.
How often should I collapse and store my dog crate?
This depends on your lifestyle. If you travel frequently or have limited space, you might collapse it regularly. If your dog uses their crate daily, you’ll probably keep it set up permanently. There’s no set schedule—do what works best for your situation.
Will collapsing my crate damage it?
No, collapsing your crate won’t damage it when done properly. Crates are specifically designed to collapse and expand repeatedly. Just follow the manufacturer’s instructions and avoid forcing any parts.
How do I know which way to collapse my specific crate?
Check your crate’s manual or manufacturer’s website for specific instructions. If you’ve lost the manual, many manufacturers provide online guides. When in doubt, look for the hinges and latches—they’ll show you the intended collapse direction.
Can I collapse a crate if it’s old or damaged?
You can attempt to collapse an older crate, but be extra careful. Older materials might be more brittle or corroded. If you notice significant damage or rust, it might be safer to replace the crate rather than risk further damage during collapse.
What’s the best way to transport a collapsed crate?
Use a storage bag or crate carrier if you have one. If not, secure the collapsed crate with bungee cords or storage straps to prevent it from accidentally expanding during transport. Place it in your vehicle in a stable location where it won’t shift during driving.
Should I disassemble all the fasteners from my plastic crate?
Yes, to fully collapse a plastic crate, you’ll need to remove all fasteners. However, keep them all together in a labeled bag so reassembly is easy. Some people prefer to leave fasteners in place and just fold the crate partially if they use it frequently.
How can I make my dog comfortable with their crate being stored away?
Dogs who are properly crate trained understand their crate is safe whether it’s set up or stored. They won’t be anxious about it being put away. If your dog seems concerned, make sure they’re fully comfortable with bonding with you and understand their crate is a positive space. You might also want to refresh their training when you set the crate back up.
Can I use a collapsed crate as a bed or furniture?
While you technically could, it’s not recommended. A collapsed crate isn’t designed to support weight and could become damaged. Keep your collapsed crate for storage purposes only.
What if my crate has a top that won’t fold?
Some crates have removable tops rather than folding tops. If your top won’t fold, check if it’s meant to be removed entirely. Look for latches or bolts that might be holding it in place. If it’s permanently attached and won’t fold, consult your manual or contact the manufacturer.
Learning to collapse your dog crate is a practical skill that every dog owner should master. Whether you’re dealing with limited space, planning a trip, or simply need to store your crate temporarily, the process is straightforward once you understand your specific crate type. Metal, plastic, and fabric crates all collapse differently, but the principles remain the same: remove everything inside, locate and release the fastening mechanisms, and fold or separate the parts carefully.
Remember that a well-maintained crate is a safe crate. Regular cleaning, inspection, and proper storage ensure your crate stays in excellent condition for years to come. Your dog deserves a clean, safe space to rest and relax, whether the crate is set up or stored away. By following this guide, you’ll be able to collapse and store your crate like a pro, freeing up valuable space in your home while keeping your equipment in top shape.
For more information about pet care and training, check out resources from the American Kennel Club and the ASPCA. You can also consult your veterinarian for personalized advice about crate training and proper crate usage for your specific dog.