How to Draw a Realistic Dog: Step-by-Step Guide
Whether you’re an aspiring artist or just looking for a fun creative outlet, learning how to draw a realistic dog can be incredibly rewarding. There’s something magical about capturing the personality and spirit of man’s best friend on paper. From the soulful eyes to the perfectly proportioned snout, realistic dog drawing requires patience, practice, and a solid understanding of canine anatomy.
The good news? You don’t need to be a professional artist to create stunning dog portraits. With the right techniques, tools, and a bit of determination, anyone can master the fundamentals of drawing dogs that look like they might jump right off the page. This comprehensive guide will walk you through every step of the process, breaking down complex techniques into manageable chunks.
Before we dive into the nitty-gritty, it’s worth noting that understanding dog anatomy is crucial. When you learn about dog facial features like eyebrows, you’ll appreciate the subtle details that make each dog unique. Plus, if you’re curious about canine behavior while you draw, you might enjoy exploring fun facts like why dogs love belly rubs—it might inspire your next artistic subject!
Essential Materials and Tools
Before you start sketching, let’s talk about what you’ll need. The right materials can make an enormous difference in your final result. You don’t need to break the bank—some of the best dog drawings are created with surprisingly basic supplies.
Pencils: Invest in a good range of graphite pencils. You’ll want HB, 2B, 4B, 6B, and 8B pencils. Harder pencils (H grades) are great for initial sketching, while softer pencils (B grades) are perfect for shading and creating depth. The variation allows you to build up layers gradually.
Paper: Use quality drawing paper with a slight tooth or texture. Smooth paper can be slippery, while heavily textured paper might be too grabby. Medium-weight paper (around 140 gsm) works beautifully for most dog portraits.
Erasers: Keep both a kneaded eraser and a regular eraser handy. Kneaded erasers are fantastic for lifting highlights and creating soft edges, while regular erasers handle broader corrections.
Blending tools: Blending stumps, tortillons, and even tissue paper help you create smooth transitions. Your own fingers work too, though they can transfer oils to your paper.
Additional supplies: A ruler, compass, and measuring calipers help ensure accurate proportions. A good reference photo is absolutely essential—you can’t draw realistically from memory alone.
Understanding Canine Anatomy
Realistic dog drawing starts with understanding the underlying structure. Dogs have a distinctly different skeletal and muscular system compared to humans, and grasping these differences is fundamental to your success.
The canine head is composed of several key shapes. The skull forms the basic foundation, with the muzzle extending forward. Unlike humans, dogs have a pronounced snout that varies dramatically by breed. A Dachshund’s elongated muzzle differs vastly from a Bulldog’s flattened face, yet both follow the same basic anatomical principles.
The body structure includes the chest, which is typically deeper than it is wide, the abdomen, and the hindquarters. Dogs are built for movement, with their center of gravity positioned differently than humans. Their legs are positioned more toward the corners of their body, allowing for that characteristic trotting gait.
Understanding muscle groups helps you draw dogs in various poses convincingly. The trapezius, deltoid, and triceps create definition in the front legs, while the quadriceps and hamstrings shape the rear legs. The chest muscles create the prominent sternum line visible in lean dogs.
According to the American Kennel Club, there are hundreds of dog breeds, each with unique anatomical characteristics. Studying breed standards can help you understand how to capture breed-specific features accurately.
Getting the Proportions Right
Proportions are everything in realistic dog drawing. Even slight miscalculations can make your drawing look “off,” even if you can’t quite pinpoint why. Learning to measure and compare is crucial.
The head is your basic unit of measurement. In most dogs, the body length from the chest to the rear is approximately 1.5 to 2 times the head length. The legs are typically equal to about 1 head length from shoulder to paw. These ratios vary by breed—Corgis have proportionally shorter legs, while Greyhounds have longer, more elegant limbs.
When drawing the head specifically, divide it into thirds. The top third includes the forehead and skull, the middle third contains the eyes, and the bottom third encompasses the muzzle and jaw. The eyes are typically positioned about one-third of the way down the head, not in the middle as many beginners assume.
The distance between the two eyes should equal approximately one eye width. This spacing creates that characteristic alert canine expression. Eyes set too close together make dogs look odd; eyes too far apart flatten the face.
For the muzzle, measure from the inner corner of the eye to the tip of the nose. This distance should be roughly equal to the distance from the top of the head to the inner eye corner. These mathematical relationships ensure your dog looks proportionally correct.
If you’re interested in exploring different dog types beyond drawing, our dog breed quiz can help you understand different breeds—knowledge that translates directly to more accurate drawings.
Drawing Facial Features with Precision
The face is where your dog drawing truly comes to life. These features demand careful attention and multiple layers of refinement.
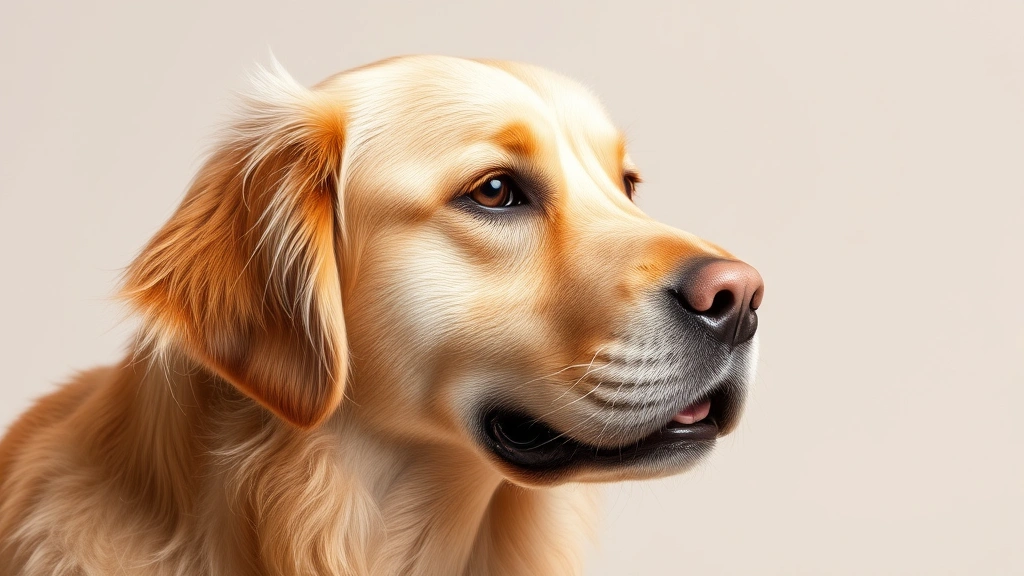
Eyes: Eyes are the window to a dog’s soul and deserve your utmost attention. Start with a basic almond shape, tilted slightly upward at the outer corner. The iris should be a perfect circle, and the pupil an even smaller circle within it. Here’s the critical part: leave a small white highlight in the pupil—this creates that magical “alive” quality. The highlight should be consistent with your light source, typically in the upper portion of the pupil.
The upper eyelid is typically darker than the lower lid, and the area directly above the eye (the eyebrow line) should show subtle shading. Dogs have that characteristic worried or expressive look partly because of the slight fold above their eyes. Dogs do have eyebrows, and capturing this subtle feature elevates your realism significantly.
Nose: The dog’s nose is rarely a simple black oval. It has depth, texture, and subtle shading. Start with the basic shape—typically a rounded triangle or heart shape depending on the breed. The top of the nose is usually the darkest area, while the edges have slightly softer shadows. Create texture by adding small dots or marks suggesting the pores of the nose leather. The underside of the nose, where it meets the muzzle, often has a subtle highlight.
Mouth: The mouth is deceptively complex. Start with a center line running from the nose to the chin. The mouth typically appears as an upside-down “V” shape at the base of the nose. The corners of the mouth (where the lips meet the muzzle) should show subtle shadows. If the dog has visible teeth, render them carefully—they’re usually off-white or cream-colored, not pure white, and have individual shadows between each tooth.
Ears: Ears vary tremendously by breed. Floppy ears hang down and cast shadows on the face and neck. Pricked ears stand upright and catch light differently. Always note the inner ear structure—the skin inside the ear is often thinner and shows more pink coloration. Add texture to the ear leather with directional lines suggesting the fur growth pattern.

Mastering Fur Texture and Shading
Realistic dog fur is perhaps the most challenging element to master. It’s not just about shading—it’s about creating the illusion of individual hairs while maintaining overall form.
Understanding fur direction: Fur doesn’t grow randomly; it follows specific patterns called the coat pattern. On the head, fur typically grows outward from the center. On the body, it generally flows backward toward the rear legs. Understanding these patterns is crucial for creating believable texture.
Layering technique: Build your shading in multiple layers. Start with a light overall tone, then gradually add darker values. This approach gives you more control and prevents over-darkening. Use directional pencil strokes that follow the direction of fur growth.
Creating texture: Use short, overlapping strokes to suggest individual hairs. These strokes should follow the coat pattern. Vary the pressure on your pencil—some strokes should be light and barely visible, while others are darker and more pronounced. This variation creates the appearance of depth and three-dimensionality.
Highlights and shadows: The highlight areas (typically where light hits the dog directly) should be the lightest values, often left as white paper. Shadows appear on the opposite side from the light source. Mid-tones fill the space between highlights and shadows, creating the rounded form of the dog.
Different coat types: Short-haired dogs show more muscle definition and require fewer individual hair strokes. Long-haired dogs need extensive layering and directional work to suggest length and flow. Curly or wiry-coated dogs need a different approach entirely, with clustered marks suggesting the texture of the coat.
According to ASPCA resources, different dog breeds have vastly different coat characteristics, from the sleek Weimaraner to the fluffy Chow Chow. Studying these variations will improve your drawing versatility.
Complete Step-by-Step Drawing Process
Step 1: Gather your reference and materials
Find a clear, well-lit reference photo of the dog you want to draw. The photo should show good detail without extreme shadows. Arrange your materials within reach and ensure good lighting for your workspace.
Step 2: Lightly sketch the basic shapes
Using your HB pencil, very lightly sketch the overall composition. Start with a circle for the head and an oval for the body. Don’t press hard—these are guide lines that you’ll erase later. Sketch the general position of the legs using simple cylinders. This step establishes your composition and ensures the dog fits properly on your paper.
Step 3: Refine the outline
Using slightly more pressure, refine the outline of the dog. Follow the contours more carefully. Adjust proportions as needed. Remember those mathematical ratios we discussed earlier. This outline should still be light enough to erase, but clear enough to guide your detailed work.
Step 4: Map out facial features
Lightly sketch the positions of the eyes, nose, mouth, and ears. Use your proportional guidelines. The eyes should be at approximately one-third down the head. Double-check the spacing between eyes and the overall facial proportions.
Step 5: Begin detailing the face
Start with the eyes. Sketch the basic eye shapes, then add the iris and pupil. Include that all-important highlight. Move to the nose, sketching the basic shape and suggesting nostrils. Add the mouth line and indicate the ears’ positions more precisely.
Step 6: Add value to the face
Begin shading with your 2B pencil. Start with light strokes, building value gradually. Shade around the eyes to create depth. Darken the pupils while preserving the highlight. Add shadow to the nose, making the top darker than the edges. Create shadows under the chin and around the mouth. This is where your dog really starts to emerge from the paper.
Step 7: Develop the body structure
Sketch the major muscle groups and body contours more clearly. Indicate where shadows will fall based on your light source. Suggest the rib cage and leg structure. This foundation ensures your shading will follow logical anatomical lines.
Step 8: Begin body shading
Using your 2B and 4B pencils, start shading the body. Follow the fur direction with your pencil strokes. Build value gradually, working from light to dark. Leave highlight areas light. Create shadows in the chest cavity, under the belly, and on the far side from the light source.
Step 9: Add fur texture
This is where patience pays off. Using directional strokes with your 4B and 6B pencils, create the illusion of fur. Follow the coat pattern. Vary your stroke length and pressure. Build layers gradually. Don’t rush this step—realistic fur texture takes time.
Step 10: Refine details and increase contrast
Step back and assess your drawing. Add darker values where needed using your 6B or 8B pencil. Sharpen edges that should be crisp. Soften edges that should be diffused. Add final details like individual whiskers, claw definition, and subtle texture variations.
Step 11: Final adjustments
Use your kneaded eraser to lift highlights and create luminosity. Add any final dark accents. Check that your highlights and shadows make logical sense with your light source. Sign your work!
Advanced Techniques for Realism
Once you’ve mastered the basics, these advanced techniques elevate your dog drawings to the next level.
Atmospheric perspective: Even in a single dog portrait, you can create depth. The far side of the dog should be slightly less detailed and slightly less contrasty than the near side. This subtle technique creates three-dimensionality.
Lost and found edges: Don’t outline everything. Some edges should blend into the background, while others remain sharp. This variation creates visual interest and realism. The edge where the dog’s back meets the background might be softer, while the edge of the nose is crisp.
Reflected light: Light doesn’t just create highlights and shadows—it bounces. The underside of a dog’s chin might catch reflected light from the ground or a light surface. Adding subtle reflected light creates realism.
Color temperature: Even in graphite, you can suggest color temperature. Shadow areas can feel warmer or cooler depending on your technique. Shadows in cool-toned fur might be rendered with slightly less pressure or different pencil angles than warm-toned shadows.
Negative space drawing: Instead of drawing the dog, draw the space around the dog. This forces you to see shapes differently and often results in more accurate proportions.
If you’re looking to expand your artistic knowledge about dogs beyond just drawing them, consider exploring topics like whether dogs are ticklish—understanding canine sensitivity can inform how you depict their expressions and reactions. For a different artistic style, you might also explore drawing cute dogs versus realistic ones, or focus specifically on drawing dog paws in detail.
Common Mistakes to Avoid
Eyes too large: The most common beginner mistake is drawing eyes too big. Reference your proportions constantly. Eyes should be relatively small compared to the overall head size.
Symmetrical faces: Dog faces aren’t perfectly symmetrical, and neither should your drawings be. One eye might be slightly larger or positioned differently than the other. This asymmetry creates character and realism.
Flat shading: Avoid simple, flat areas of tone. Real fur has varied texture and value. Build shading gradually with multiple layers and directional strokes.
Ignoring the light source: All your shadows and highlights should be consistent with a single light source. If you’re confused about where shadows should fall, establish your light direction at the beginning and reference it constantly.
Over-rendering the entire drawing: Not every part of your drawing should be equally detailed. Focus your detail where the eye naturally goes—typically the face. The background and less important areas can be simpler.
Using pure black: Avoid the temptation to use pure black for shadows. Instead, build value gradually. The darkest areas of your drawing should be very dark but still show some texture and variation.
Neglecting the ears and paws: New artists often rush through ears and paws, but these details matter. Ears establish breed characteristics, and paws ground the dog in space. Give them the attention they deserve.
Research from veterinary hospitals shows that understanding canine anatomy helps not just artists but anyone who works with dogs. The more you understand how dogs are built, the better you’ll draw them.
Frequently Asked Questions
What’s the best pencil for drawing realistic dogs?
A range of graphite pencils is ideal. Start with HB for initial sketching, then use 2B, 4B, 6B, and 8B for progressively darker shading. The softer B pencils allow for the smooth tonal gradations essential for realistic fur.
How long does it take to draw a realistic dog?
A detailed, realistic dog portrait typically takes 8-20 hours, depending on size, complexity, and your experience level. Larger drawings and those with complex fur patterns take longer. Don’t rush—quality takes time.
Can I draw a realistic dog from a photo or should I use a live model?
Photos are actually preferable for learning. A live dog won’t stay still, and photos give you time to study proportions and details. As you improve, you can challenge yourself with live drawing.
What’s the most important skill for realistic dog drawing?
Understanding proportions and anatomy is foundational, but the ability to observe and accurately render value (light and shadow) is what truly creates realism. Spend time studying how light interacts with fur and form.
Should I use reference lines and grids?
Absolutely! Using a grid to transfer your reference image to your paper is completely legitimate. Many professional artists use grids. It ensures accurate proportions and frees you to focus on rendering and technique.
How do I draw different dog breeds accurately?
Study breed standards and multiple reference photos of each breed. Note unique characteristics: ear shape and placement, muzzle length, body proportions, and coat type. Understanding these breed-specific features is crucial for accurate representation.
What if I make a mistake?
Mistakes are part of learning. Use your eraser to lighten areas and try again. Many “mistakes” can be incorporated into your drawing—a slight asymmetry often adds character. If you’re truly stuck, you can always start a new drawing with the knowledge you’ve gained.
How do I create the illusion of fur without drawing every single hair?
You don’t need to draw individual hairs. Instead, use layered, directional strokes that suggest fur direction. Vary your pressure and stroke length. Use negative space—the background showing through creates the illusion of individual hairs.
Ready to take your dog drawing skills to the next level? Remember that realistic dog drawing is a journey, not a destination. Each drawing teaches you something new. Start with a simple dog photo, apply these techniques, and gradually tackle more complex poses and breeds. Your patience and practice will absolutely pay off. Happy drawing!