Making homemade dog biscuits is one of the easiest ways to show your furry best friend how much you care—plus, you’ll know exactly what’s going into those treats. No mystery ingredients, no preservatives, just pure doggy joy in bite-sized form. Whether your pup is a picky eater or a vacuum cleaner with four legs, we’ve got recipes that’ll have their tail wagging so hard they might take flight.
Table of Contents
- Why Make Homemade Dog Biscuits Instead of Store-Bought?
- Essential Ingredients for DIY Dog Biscuits
- Recipe #1: Classic Peanut Butter Biscuits
- Recipe #2: Sweet Potato and Carrot Delights
- Recipe #3: Apple and Cinnamon Crunch Bites
- Recipe #4: Pumpkin Spice (Without the Hype)
- Recipe #5: Banana and Oat Powerhouse
- Storage and Shelf Life Tips
- Portion Control and Feeding Guidelines
- Customizing Recipes for Your Dog’s Needs
- Common Mistakes to Avoid
- Frequently Asked Questions
- Final Thoughts: Why Your Dog Deserves Homemade Love
Why Make Homemade Dog Biscuits Instead of Store-Bought?
Let’s be real: commercial dog treats can be sketchy. You’re reading ingredient lists with words you can’t pronounce, and suddenly you’re wondering if your dog is eating food or a science experiment. When you bake homemade dog biscuits, you’re in complete control. You choose the ingredients, the portion sizes, and whether those biscuits are packed with nutrients or just taste like love (spoiler: they do both).
Plus, homemade treats are usually cheaper than fancy store brands. Your wallet wins, your dog wins, everyone’s happy. And let’s not forget the bonus: your kitchen will smell absolutely amazing while they’re baking. Your neighbors might start asking questions.
Essential Ingredients for DIY Dog Biscuits
Before you start mixing, let’s talk about what actually goes into safe, delicious homemade dog biscuits. The foundation usually includes dog-friendly flour, a binding agent like eggs or peanut butter, and a liquid component. Here’s what you need to know:
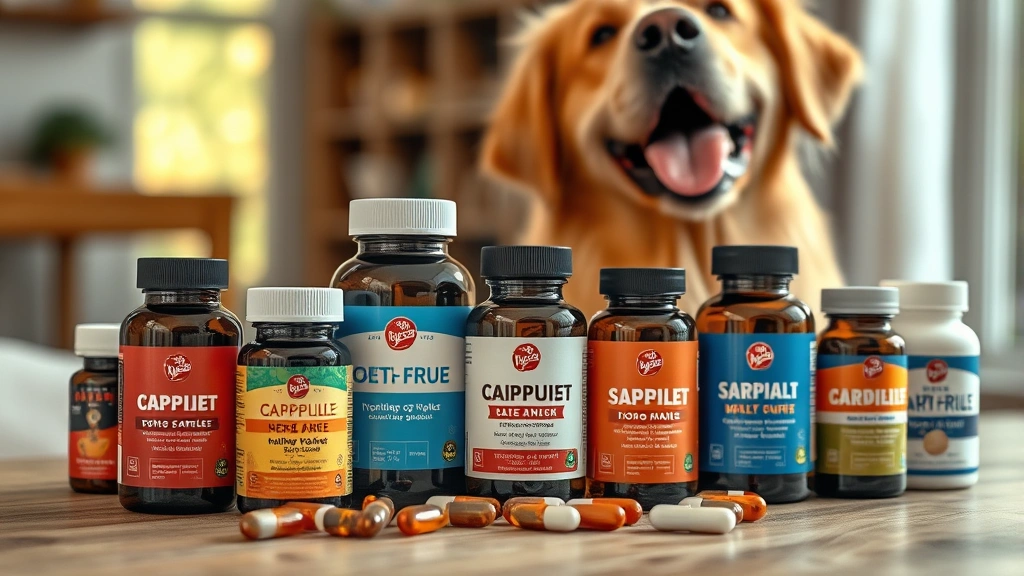
Safe Ingredients: Whole wheat flour, oat flour, peanut butter (xylitol-free!), eggs, sweet potatoes, carrots, apples, bananas, and plain pumpkin. These are your friends. According to the American Kennel Club’s nutritional guidelines, treats should make up no more than 10% of your dog’s daily caloric intake.
Avoid like the plague: chocolate, grapes, raisins, xylitol (artificial sweetener), onions, garlic, macadamia nuts, and avocado. These are toxic to dogs and have no place in your kitchen creations. When in doubt, check with your vet or consult PetMD’s nutrition resources.
Recipe #1: Classic Peanut Butter Biscuits
This is the gateway drug to homemade dog biscuits because, let’s face it, dogs lose their minds for peanut butter. It’s simple, it’s foolproof, and it requires minimal ingredients.
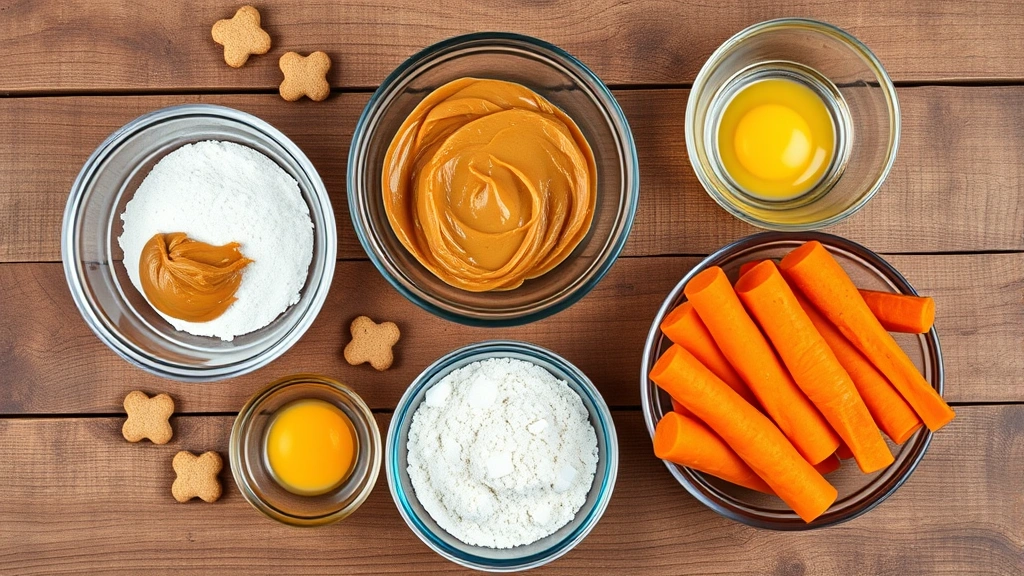
What You Need: 1 cup natural peanut butter (xylitol-free), 1 egg, 1.5 cups whole wheat flour, and a pinch of cinnamon for flavor (optional but recommended).
How to Make It: Mix peanut butter and egg together until well combined. Gradually add flour until you have a dough that’s not too sticky. Roll it out to about 1/4 inch thickness, cut into shapes with cookie cutters, and bake at 350°F for 15-20 minutes. Let them cool completely before giving them to your pup. Store in an airtight container for up to two weeks, or freeze for longer storage.
Your dog will think you’re a professional baker. You don’t need to tell them you spent 15 minutes making these.
Recipe #2: Sweet Potato and Carrot Delights
If your dog is the health-conscious type (or if you’re trying to make them that way), these nutrient-packed homemade dog biscuits are perfect. Sweet potatoes and carrots are packed with vitamins and fiber, plus they’re naturally sweet.
What You Need: 1 cup mashed sweet potato, 1/2 cup shredded carrots, 1 egg, 2 cups oat flour, and 1 tablespoon coconut oil.
How to Make It: Combine sweet potato, carrots, egg, and coconut oil. Mix in oat flour until you reach a workable dough consistency. Roll out and cut into shapes, then bake at 325°F for 25-30 minutes until golden. These biscuits are slightly softer than peanut butter ones, which makes them great for older dogs with dental issues. Learn more about managing food allergies and feeding routines if your dog has sensitivities.

Recipe #3: Apple and Cinnamon Crunch Bites
Apple and cinnamon—it’s not just for humans anymore. These homemade dog biscuits are refreshing, slightly sweet, and perfect for dogs who get bored easily.
What You Need: 1 cup unsweetened applesauce, 1 mashed banana, 2 cups whole wheat flour, 1 egg, and 1 teaspoon cinnamon.
How to Make It: Mix applesauce, banana, and egg together. Add flour and cinnamon, stirring until combined. If the dough is too wet, add more flour gradually. Roll out, cut into shapes, and bake at 350°F for 18-22 minutes. The natural sweetness from the fruit means you don’t need any added sugar—your dog’s teeth will thank you.
Recipe #4: Pumpkin Spice (Without the Hype)
Pumpkin is basically the superfood of homemade dog biscuits. It aids digestion, it’s packed with nutrients, and it makes your dog’s breath slightly better (okay, that’s a stretch, but pumpkin does help with digestion).
What You Need: 1 cup plain pumpkin puree, 1 egg, 2 cups whole wheat flour, 1/2 teaspoon cinnamon, and 1/4 teaspoon ginger (optional).
How to Make It: Combine pumpkin and egg, then mix in flour and spices. The dough should be slightly stiff. Roll out and cut into fun shapes, then bake at 350°F for 20-25 minutes. These freeze exceptionally well, so make a big batch in fall and portion them out throughout the season.
Recipe #5: Banana and Oat Powerhouse
Bananas and oats—two ingredients your dog’s digestive system will genuinely appreciate. These homemade dog biscuits are perfect for dogs who need a little extra fiber or who just love the taste of banana.
What You Need: 2 ripe bananas (mashed), 1 cup rolled oats, 1 cup whole wheat flour, 1 egg, and 1 tablespoon honey (optional).
How to Make It: Mash bananas thoroughly, add egg and honey, then fold in oats and flour. The dough will be slightly softer than others. Bake at 325°F for 20-25 minutes. These are naturally sweet and chewy, making them perfect for training rewards. Check out our guide on homemade diet supplements for pets to understand how treats fit into overall nutrition.
Storage and Shelf Life Tips
You’ve made all these beautiful homemade dog biscuits—now let’s keep them fresh. Room temperature storage in an airtight container works for about two weeks. For longer storage, freeze them in freezer bags for up to three months. Your dog won’t mind eating them straight from the freezer; in fact, they might enjoy the extra crunch and the cooling effect on their teeth.
Pro tip: Label your containers with the baking date. You might think you’ll remember when you made them, but spoiler alert: you won’t.
Portion Control and Feeding Guidelines
Here’s where people mess up: they get excited about their homemade creations and start handing them out like candy. Remember, treats should only be 10% of your dog’s daily caloric intake. A typical homemade dog biscuit is about 30-50 calories depending on size and ingredients. So if your dog eats 1,500 calories daily, treats should max out at 150 calories.
This means most dogs can handle 2-4 biscuits daily, depending on their size and other treats they’re getting. Adjust their regular food accordingly to avoid the dreaded chubby pup situation. For specific guidance, explore our pet food supplement boosters article for balanced nutrition strategies.
Customizing Recipes for Your Dog’s Needs
The beauty of making homemade dog biscuits is customization. Got a dog with allergies? Swap wheat flour for rice flour or coconut flour. Picky eater? Try different fruit and vegetable combinations. Senior dog with dental issues? Make them smaller and slightly softer. Energetic young pup? Make them bigger and crunchier.
You can also add supplements like fish oil for coat health or glucosamine for joint support. Just make sure to check with your vet before adding supplements, especially if your dog is on medication.
Common Mistakes to Avoid
Don’t overbake your homemade dog biscuits—they’ll become rock-hard and potentially damage teeth. Don’t use ingredients toxic to dogs (seriously, check that list again). Don’t skip the cooling period before storing—warm biscuits create moisture and mold. And please, for the love of all things good, don’t use xylitol-containing peanut butter. That stuff is legitimately dangerous for dogs.
Frequently Asked Questions
How long do homemade dog biscuits last?
Properly stored in an airtight container at room temperature, they’ll last about two weeks. Frozen, they’ll keep for up to three months. Always check for signs of mold or off smells before giving them to your dog.
Can I use regular flour instead of whole wheat?
You can, but whole wheat flour has more nutritional value and fiber. If your dog has grain sensitivities, try oat flour, rice flour, or coconut flour instead. Regular all-purpose flour works in a pinch, but it’s not ideal nutritionally.
Are homemade dog biscuits cheaper than store-bought?
Usually yes, especially if you buy ingredients in bulk. A batch of 24 biscuits typically costs $2-4 to make, whereas premium store-bought treats can run $10-15 for the same amount.
Can I add chocolate or peanut butter chips?
Absolutely not for chocolate—it’s toxic to dogs. Peanut butter chips might work if they’re xylitol-free, but honestly, your dog won’t miss them. The base ingredients are already delicious.
What if my dog has food allergies?
Work with your vet to identify safe ingredients, then build recipes around those. Many dogs with allergies do great with limited-ingredient homemade dog biscuits because you control exactly what goes in.
Can puppies eat homemade dog biscuits?
Yes, but adjust size and hardness. Puppies have developing teeth, so softer biscuits are better. Make them smaller for portion control since puppies have higher caloric needs but smaller stomachs.
Final Thoughts: Why Your Dog Deserves Homemade Love
Making homemade dog biscuits isn’t just about the treats themselves—it’s about showing your dog they’re worth the effort. You’re taking time out of your day to create something special, something safe, something made with love. Your dog might not understand the effort, but they’ll definitely understand the taste, and they’ll love you even more for it.
Start with whichever recipe sounds easiest, nail that one, then experiment with others. Your dog will be your official taste tester (and they’re very thorough). Before you know it, you’ll have a rotation of homemade treats that your pup looks forward to, and you’ll be that person everyone asks for the recipe. You’re welcome in advance.