Making homemade dog treats recipes vet approved is one of the best ways to show your furry best friend some love while knowing exactly what they’re munching on. No mystery ingredients, no sketchy preservatives, just pure doggy delight made in your own kitchen. Plus, your pup will think you’re basically a canine chef (spoiler alert: you kind of are).
Table of Contents
- Why Homemade Dog Treats Beat Store-Bought Every Time
- Essential Ingredients for Safe Dog Treat Recipes
- Recipe #1: Peanut Butter & Banana Bites
- Recipe #2: Sweet Potato & Chicken Training Treats
- Recipe #3: Apple Cinnamon Crunchy Bites
- Recipe #4: Pumpkin & Oat Digestive Boosters
- Recipe #5: Carrot & Coconut Oil Dental Chews
- Recipe #6: Blueberry & Yogurt Antioxidant Treats
- Recipe #7: Beef Broth & Vegetable Frozen Popsicles
- Recipe #8: Peanut Butter Pumpkin Pupcakes
- Recipe #9: Tuna & Sweet Potato Savory Squares
- Recipe #10: Chicken & Green Bean Low-Calorie Bites
- Recipe #11: Peanut Butter & Apple Frozen Licks
- Recipe #12: Oat & Honey Energy Balls
- Frequently Asked Questions
- Storage Tips for Maximum Freshness
- Common Mistakes to Avoid
- Conclusion: Treat Your Pup Right
Why Homemade Dog Treats Beat Store-Bought Every Time
Let’s be real—commercial dog treats can be a nutritional minefield. You’re reading labels with ingredients you can’t pronounce, wondering if that mystery meat by-product is actually a meat product. When you make budget-friendly homemade pet treats, you control everything. You know your dog isn’t getting artificial colors, unnecessary fillers, or ingredients that’ll make them itch like they’ve got fleas. Veterinarians consistently recommend homemade options because they’re fresher, customizable for dietary needs, and honestly, way more cost-effective. Your wallet and your pup’s digestive system will thank you.
Essential Ingredients for Safe Dog Treat Recipes
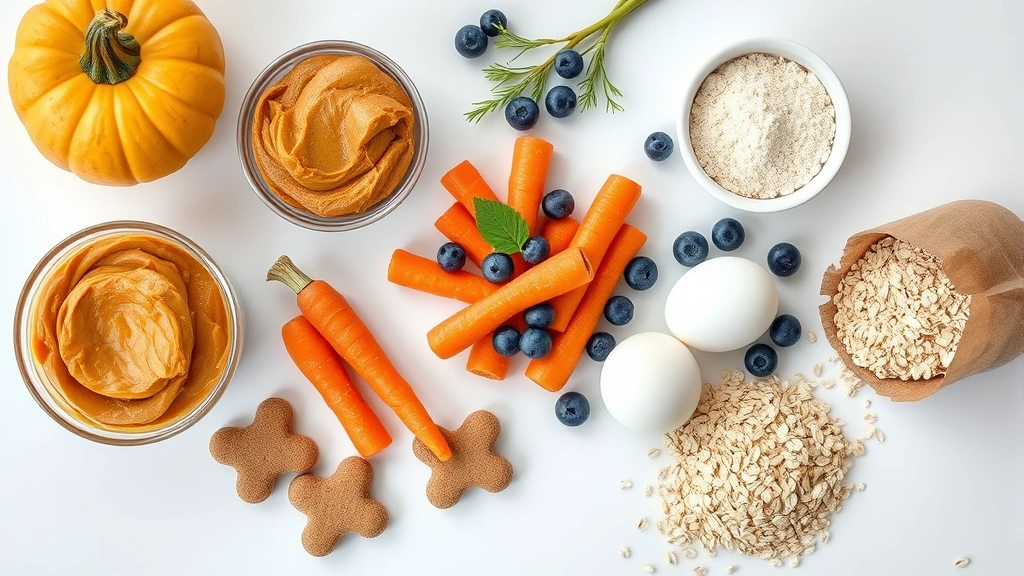
Before we dive into the good stuff, let’s talk basics. The foundation of any vet-approved dog treat starts with understanding what’s safe and what’s absolutely not. According to the American Kennel Club, certain ingredients are non-negotiable. Whole grains like oats and brown rice are fantastic. Lean proteins like chicken and turkey are your friends. Peanut butter (xylitol-free, obviously) is basically doggy gold. Fresh fruits and veggies from your safe vegetables for dogs guide work beautifully. The key is sticking with natural, recognizable ingredients that you’d feel comfortable eating yourself.
Recipe #1: Peanut Butter & Banana Bites
This is the gateway drug to homemade dog treats. Mix one cup of natural peanut butter (no xylitol!), one mashed banana, and two cups of whole wheat flour. Knead it into a dough, roll it out, cut it into bite-sized shapes, and bake at 350°F for about 15 minutes. Your dog will lose their mind. These treats are packed with potassium and protein, making them perfect for active pups. Store them in an airtight container for up to a week, or freeze them for longer storage. Pro tip: make them in different shapes to keep mealtime exciting.
Recipe #2: Sweet Potato & Chicken Training Treats
Need something for training sessions? These little powerhouses are perfect. Dice cooked chicken breast into tiny pieces and mix with mashed sweet potato and a tablespoon of coconut oil. Spread the mixture on a parchment-lined baking sheet in small portions and freeze. Once frozen, pop them into a container and use them straight from the freezer. Sweet potatoes are loaded with fiber and vitamins, while chicken provides lean protein. These are ideal for high-value treats from kitchen ingredients during training sessions.
Recipe #3: Apple Cinnamon Crunchy Bites
Dogs love the natural sweetness of apples, and cinnamon adds a flavor boost without any sugar. Combine two cups of rolled oats, one grated apple (seeds removed—they contain cyanogenic compounds), one teaspoon of cinnamon, and a quarter cup of unsweetened applesauce. Mix thoroughly, spread on a baking sheet, and bake at 325°F for 20-25 minutes until golden and crunchy. Cut into treat-sized pieces once cooled. These are great for dental health because the crunchiness helps clean teeth. Make sure you remove all apple seeds before using—they’re toxic to dogs.
Recipe #4: Pumpkin & Oat Digestive Boosters
Perfect for dogs with sensitive tummies, this recipe is basically a digestive hug. Mix one cup of canned pumpkin puree, two cups of rolled oats, and one egg. Drop spoonfuls onto a baking sheet and bake at 350°F for 20 minutes. Pumpkin is packed with soluble fiber and helps regulate digestion. Vets recommend these for dogs recovering from digestive upset or those prone to constipation. They’re mild, gentle on the stomach, and taste like autumn in treat form. Store in the refrigerator for up to five days.
Recipe #5: Carrot & Coconut Oil Dental Chews
Carrots are nature’s toothbrush, and coconut oil has antimicrobial properties. Grate raw carrots and mix with a tablespoon of coconut oil and a splash of low-sodium bone broth. Form into stick shapes and freeze overnight. These frozen treats are fantastic for teething puppies and dogs with plaque buildup. The natural crunchiness combined with the coconut oil creates a powerful dental-cleaning duo. Plus, carrots are low in calories, so you can give these guilt-free. Just make sure carrots are chopped small enough that your pup can’t choke on them.
Recipe #6: Blueberry & Yogurt Antioxidant Treats
Blueberries are superfoods for dogs, loaded with antioxidants and vitamins. Mix one cup of plain Greek yogurt, one cup of fresh blueberries (or frozen, thawed), and half a cup of whole wheat flour. Spoon the mixture into silicone molds or onto a baking sheet and freeze for at least four hours. These no-bake treats are perfect for hot summer days. Yogurt provides probiotics for gut health, while blueberries support cognitive function and eye health. They’re especially great for senior dogs who need that extra antioxidant boost. PetMD frequently highlights blueberries as one of the top superfoods for canine nutrition.
Recipe #7: Beef Broth & Vegetable Frozen Popsicles
On scorching summer days, these frozen treats are absolute lifesavers. Simmer beef bones or use low-sodium beef broth, strain it, and pour into ice cube trays or popsicle molds. Add finely diced safe vegetables like carrots, green beans, or peas. Freeze solid and serve. These hydrating treats help keep your pup cool while providing nutrients. They’re especially good for senior dogs who might not drink enough water. The gelatin from bone broth is fantastic for joint health, making these treats functional medicine in frozen form.
Recipe #8: Peanut Butter Pumpkin Pupcakes
Because sometimes your dog deserves a cupcake, too. Mix one cup of natural peanut butter, one cup of pumpkin puree, two eggs, two cups of whole wheat flour, and one teaspoon of baking powder. Pour into cupcake liners and bake at 350°F for 18-20 minutes. These are perfect for birthdays or special occasions. You can even top them with a dollop of plain yogurt. Make sure you’re using peanut butter without xylitol—it’s toxic to dogs. These pupcakes are moist, delicious, and your dog will think they’ve won the lottery. Store in an airtight container in the fridge for up to a week.
Recipe #9: Tuna & Sweet Potato Savory Squares
For the seafood-loving pups, this one’s a winner. Mix one can of tuna (in water, drained), one mashed sweet potato, one egg, and one and a half cups of oat flour. Spread onto a greased baking sheet and bake at 375°F for 15-20 minutes. Cut into squares once cooled. Tuna is packed with omega-3 fatty acids that support coat and skin health. These treats are especially beneficial for dogs with dull coats or skin irritation. The aroma alone will have your dog hovering around the kitchen like a furry helicopter.
Recipe #10: Chicken & Green Bean Low-Calorie Bites
Perfect for weight-conscious pups, these treats are nutritious without being calorie bombs. Boil chicken breast and cut into small cubes, then mix with steamed green beans cut into tiny pieces. You can add a tiny bit of low-sodium chicken broth to bind them, then freeze in ice cube trays. These are basically guilt-free treats you can hand out liberally. Green beans are high in fiber and vitamins while being incredibly low in calories. They’re ideal for dogs on a weight management plan or those prone to obesity. Check out our guide on what not to feed your dog to ensure you’re avoiding problematic ingredients.
Recipe #11: Peanut Butter & Apple Frozen Licks
Spread natural peanut butter on a plate, top with finely diced apple (seeds removed), and freeze. Once solid, break into chunks. These are perfect for hot days and provide a long-lasting treat that keeps dogs entertained. The combination of protein from peanut butter and natural sugars from apple creates a flavor explosion dogs absolutely love. Freeze them in layers for extra interest—alternate peanut butter and apple layers. Your dog will happily lick away for extended periods, which is great for mental stimulation and keeping them cool simultaneously.
Recipe #12: Oat & Honey Energy Balls
These no-bake treats are quick and perfect for on-the-go. Mix two cups of rolled oats, one-third cup of natural peanut butter, and one tablespoon of honey. Roll into balls and refrigerate. Honey provides natural energy and has antimicrobial properties. These treats are fantastic for active dogs who need an energy boost before playtime or training sessions. Just remember that honey should only be given in moderation—it’s still sugar, after all. Store these in the fridge and they’ll last about a week. They’re also perfect for hiding pills if your pup needs medication.
Frequently Asked Questions
How long do homemade dog treats last?
Most homemade dog treats last 5-7 days in an airtight container in the refrigerator. Frozen treats can last 2-3 months in the freezer. Always check for signs of spoilage like mold or off odors before serving. If you’re making treats without preservatives, refrigeration or freezing is essential to prevent bacterial growth.
Can I substitute ingredients in these recipes?
Absolutely! Homemade treats are flexible. If your dog has allergies, swap out ingredients accordingly. Use chicken instead of beef, substitute sweet potato for pumpkin, or use different safe vegetables. Just avoid toxic ingredients like chocolate, grapes, raisins, onions, garlic, and xylitol. Always research before substituting to ensure the new ingredient is dog-safe.
Are homemade treats better than store-bought?
Yes, generally speaking. Homemade treats let you control ingredients, avoid artificial additives, and customize for your dog’s specific needs. They’re also usually more cost-effective. However, some commercial treats are high-quality and vet-approved. The key is reading labels carefully and choosing products with recognizable ingredients.
How much should I feed my dog in treats?
Treats should make up no more than 10% of your dog’s daily caloric intake. The remaining 90% should come from their regular dog food. If you’re using treats for training, adjust their regular meals accordingly to prevent overfeeding. Always consult with your vet about appropriate portion sizes for your specific dog.
Do I need to cook treats, or can I make no-bake versions?
Both work! No-bake treats like frozen popsicles and yogurt bites are quick and preserve more nutrients. Baked treats last longer and can be crunchier. Choose based on your preference and storage capabilities. No-bake treats are perfect for summer, while baked treats are great year-round.
What if my dog has food allergies?
Homemade treats are perfect for allergic pups because you control every ingredient. Work with your vet to identify safe ingredients for your dog. Common allergens include wheat, chicken, and beef, so you might substitute with turkey, fish, or grain-free options. Always introduce new treats gradually to monitor for reactions.
Storage Tips for Maximum Freshness
Proper storage is crucial for keeping homemade treats fresh and safe. Room temperature works for treats that will be consumed within 2-3 days, but refrigeration is safer. Use airtight glass containers or freezer bags to prevent moisture loss and contamination. Label containers with the date made so you know when to toss them. Frozen treats can last months, making them perfect for batch-making. When thawing frozen treats, move them to the fridge rather than leaving them at room temperature to prevent bacterial growth.
Common Mistakes to Avoid
Don’t use xylitol—ever. It’s extremely toxic to dogs. Avoid chocolate, grapes, raisins, onions, garlic, avocado, and macadamia nuts. Don’t make treats too large; choking is a real risk. Avoid adding salt or excessive sugar. Don’t skip the vet consultation if your dog has health conditions. Don’t store treats in plastic containers for extended periods; they can leach chemicals. Don’t assume all human-safe foods are dog-safe. When in doubt, consult your vet or check UC Davis School of Veterinary Medicine resources for comprehensive ingredient safety information.
Conclusion: Treat Your Pup Right
Making homemade dog treats recipes vet approved is easier than you think and infinitely more rewarding than buying bags of mystery treats. Your dog gets delicious, nutritious snacks made with love, and you get the satisfaction of knowing exactly what’s going into their body. Start with one of these twelve recipes, see which ones make your pup’s tail wag the hardest, and build your homemade treat repertoire from there. Your dog doesn’t need fancy store-bought treats—they just need you in the kitchen, armed with simple ingredients and a desire to spoil them. So grab those peanut butter jars, fire up the oven, and get ready to be the best treat-maker your dog could ask for. Your veterinarian will approve, your dog will be thrilled, and you’ll save money in the process. It’s a win-win-woof situation.