Learning how to make a dog bandana is easier than you think, and your pup will look absolutely adorable sporting their new accessory. Whether you’re crafting a festive triangle scarf for the holidays or a practical cooling bandana for summer, this DIY project takes less than an hour and requires minimal sewing skills. Plus, homemade bandanas are way cheaper than buying them from pet boutiques, and you get to customize them with your dog’s favorite colors and patterns.
Table of Contents
- Why Your Dog Needs a Bandana (Besides Looking Cute)
- Gathering Your Materials: What You’ll Actually Need
- Step 1: Measure and Cut Your Fabric Square
- Step 2: Fold Your Fabric Diagonally
- Step 3: Sew or Hem the Edges (The Easiest Part)
- Step 4: Trim and Finish Those Raw Edges
- Step 5: Customize and Personalize Your Creation
- Different Bandana Styles: Beyond the Basic Triangle
- Choosing Fabrics: What Works Best for Dogs
- How to Tie Your Bandana on Your Dog (The Tricky Part)
- Troubleshooting Common Bandana Problems
- Frequently Asked Questions
- Final Thoughts: Your Dog’s New Fashion Statement
Why Your Dog Needs a Bandana (Besides Looking Cute)
Before we dive into the nitty-gritty of bandana construction, let’s talk about why this simple accessory is actually pretty useful. Dog bandanas aren’t just fashion statements—they serve real purposes. A cooling bandana can help regulate your pup’s temperature during hot weather, while a festive one makes great holiday photo ops. Plus, if you’re into eco-conscious pet ownership, making your own bandanas beats buying mass-produced alternatives. Check out our guide on eco-conscious pet owners for more sustainable pet care tips.
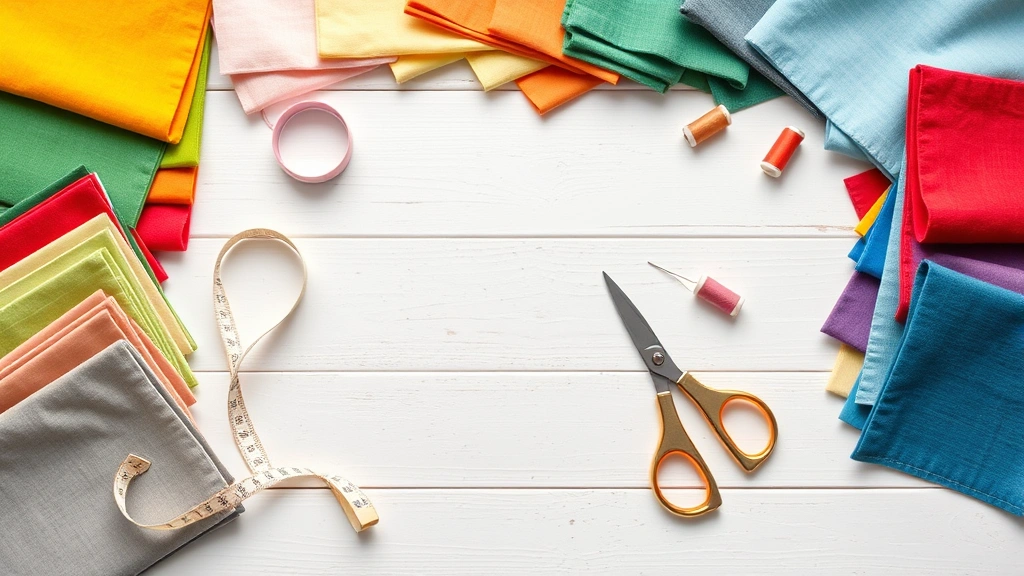
Gathering Your Materials: What You’ll Actually Need
The beauty of this project is its simplicity. You don’t need fancy supplies or expensive equipment. Here’s what you’ll need to make a dog bandana:
- One square piece of fabric (cotton or cotton-blend works best)
- Scissors (fabric scissors if you have them)
- Needle and thread (or a sewing machine if you’re feeling fancy)
- Measuring tape or ruler
- Optional: fabric paint, markers, or patches for customization
The fabric size depends on your dog’s size. Small dogs need 12×12 inch squares, medium dogs need 18×18 inches, and large dogs need 24×24 inches. Pro tip: raid your fabric scrap bin or hit up thrift stores for inexpensive fabric options.
Step 1: Measure and Cut Your Fabric Square
Precision matters here, so don’t just eyeball it. Measure twice, cut once—that’s the golden rule of any DIY project. Use your measuring tape to mark out a perfect square on your chosen fabric. If you’re working with printed fabric, make sure the pattern is oriented the way you want it when the bandana is worn.
Cut along your marked lines using sharp scissors. A clean cut makes everything easier in the next steps. If your edges are a bit frayed after cutting, that’s totally fine—we’ll deal with that shortly.
Step 2: Fold Your Fabric Diagonally
This is where the triangle shape comes in. Take your square and fold it diagonally, bringing one corner to meet the opposite corner. You should end up with a triangle that’s roughly the same size as your folded square. Press the fold firmly with your hand or iron—a crisp fold makes sewing way easier.
If you want to get fancy with dog collar styling, you can fold the long edge of the triangle inward before sewing to create a more finished look. This step is optional but gives your bandana a more polished appearance.
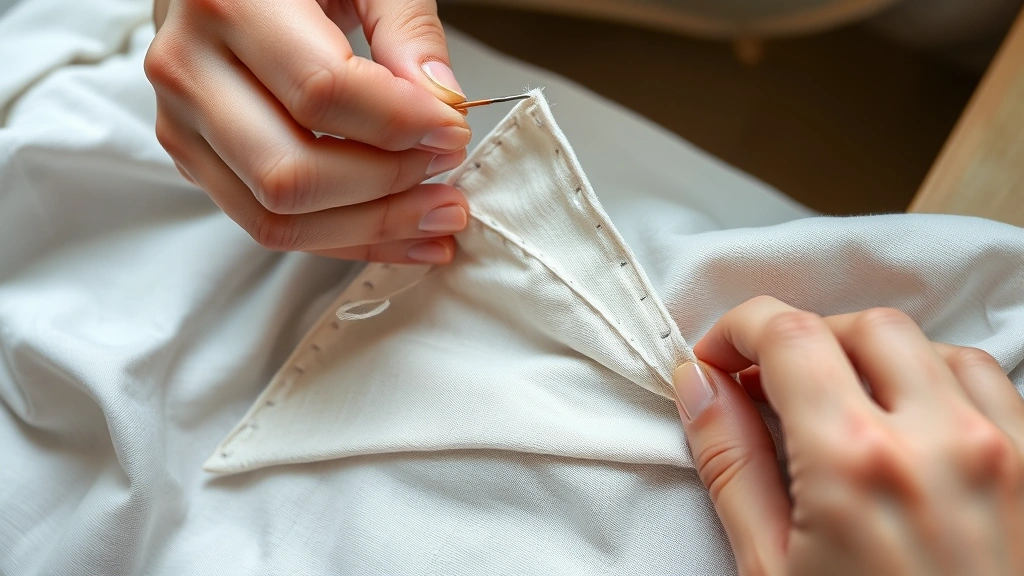
Step 3: Sew or Hem the Edges (The Easiest Part)
Now comes the actual sewing. You have two options here: the quick method and the slightly-less-quick method. For beginners, I recommend the quick method—just sew along the two short sides of your triangle, leaving the long folded edge as-is. This creates a simple triangle bandana that’s perfectly functional.
If you’re using a sewing machine, set it to a basic straight stitch and go slowly. If you’re hand-sewing, use a simple running stitch about a quarter-inch from the edge. Don’t stress about perfection—your dog won’t judge your stitching skills, I promise. A few wobbly lines just add character.
Leave about a half-inch seam allowance and backstitch at the beginning and end to prevent unraveling. This entire step should take about 10-15 minutes, even if you’re moving at a snail’s pace.
Step 4: Trim and Finish Those Raw Edges
After sewing, you’ll likely have some raw fabric edges that look a bit rough. Trim any excess thread and consider using pinking shears if you have them—these scissors cut a zigzag pattern that prevents fraying. If you don’t have pinking shears, regular scissors work fine.
For a truly finished look, you can fold the raw edges inward and do a quick whip stitch around the perimeter. This takes an extra 10 minutes but creates a super polished bandana. Alternatively, you can use fabric glue or fray-check liquid to seal the edges—no sewing required.
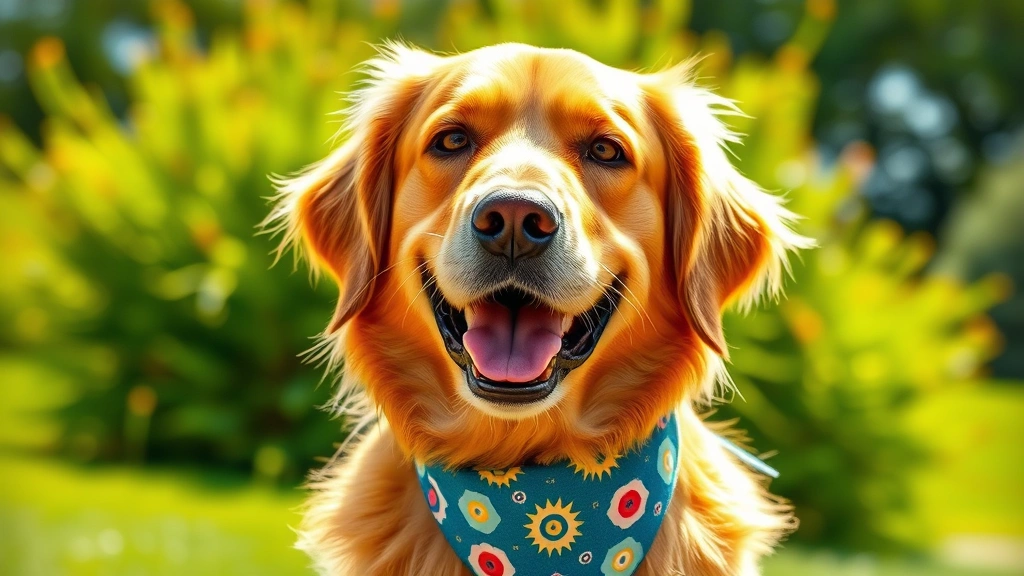
Step 5: Customize and Personalize Your Creation
Here’s where you get to have fun. Your basic bandana is now complete, but why stop there? Add your dog’s name using fabric markers or paint pens. Sew on cute patches or appliqués. Embroider a pattern. Add a small bell or jingle bell for extra pizzazz. The possibilities are genuinely endless.
If you’re making bandanas for special occasions, consider seasonal designs. Holiday patterns for Christmas, pastels for Easter, or spooky designs for Halloween. Your dog becomes a walking fashion statement, and you get bragging rights for creating it yourself.
Different Bandana Styles: Beyond the Basic Triangle
Once you’ve mastered the basic triangle bandana, you can experiment with different styles. A collar-style bandana wraps around your dog’s neck like a traditional scarf. A cooling bandana uses special fabric that retains moisture. A slip-on bandana has elastic sewn into the corners so it stays put without tying.
Each style requires slightly different construction methods, but the fundamental skills remain the same. Start with the triangle, master that, then branch out into more complex designs. It’s like learning to make healthy pet treats—start simple, then get creative.
Choosing Fabrics: What Works Best for Dogs
Not all fabrics are created equal when it comes to dog bandanas. Cotton is your best friend here—it’s breathable, washable, and durable. Cotton blends work well too. Avoid synthetic fabrics that don’t breathe, as they can get uncomfortable against your dog’s fur.
For cooling bandanas, look for moisture-wicking fabrics or specialty cooling fabrics. For winter bandanas, fleece or flannel provides extra warmth. If your dog has sensitive skin, pre-wash your fabric before cutting to prevent any irritation from dyes or finishes.
How to Tie Your Bandana on Your Dog (The Tricky Part)
Okay, so you’ve made this beautiful bandana, but now you need to actually get it on your dog without a wrestling match. Fold your triangle in half lengthwise to create a long strip. Drape it around your dog’s neck and tie the two ends together at the back or side with a simple knot.
Some dogs tolerate this better than others. If your pup is a squirmer, start by letting them sniff the bandana and wear it for short periods. Positive reinforcement with treats helps—check out our seasonal treat recipes for pets for reward ideas.
Troubleshooting Common Bandana Problems
Your bandana keeps slipping off? Try tying it tighter or adding a small velcro strip to secure it. Your dog keeps chewing it? Make sure you’re using non-toxic materials and supervise wear time. Your stitches are unraveling? Go back and reinforce them with additional stitching or fabric glue.
Most problems have simple solutions. Don’t get discouraged if your first attempt isn’t perfect. Even experienced crafters have bandana mishaps. The learning curve is short, and each bandana you make improves your skills.
Frequently Asked Questions
How long does it take to make a dog bandana?
A basic triangle bandana takes 30-45 minutes from start to finish, including measuring, cutting, and sewing. Once you get comfortable with the process, you can knock one out in 20 minutes flat.
Can I use old t-shirts or fabric scraps?
Absolutely! Repurposing old fabric is a great way to save money and reduce waste. Just make sure the fabric is clean and in decent condition. Old band t-shirts make surprisingly cool bandanas with built-in personality.
Is it safe for dogs to wear bandanas?
Yes, when properly fitted. Make sure the bandana isn’t too tight around the neck—you should be able to fit a finger underneath comfortably. Remove it if your dog seems uncomfortable or is excessively chewing at it. Always supervise your dog while wearing any accessory.
What’s the best way to wash a homemade bandana?
Machine wash on a gentle cycle with cold water, or hand wash to be extra safe. Air dry to prevent shrinkage. If you added fabric paint or markers, check the product instructions for washing guidelines.
Can I make bandanas for other pets?
Cats can wear bandanas, though most find them annoying. Small pets like rabbits or guinea pigs might enjoy tiny versions. Adjust your fabric size accordingly and always prioritize your pet’s comfort and safety.
Do I need a sewing machine?
Nope! Hand sewing works perfectly fine. It takes a bit longer, but the results are just as good. Sewing machines just speed up the process, especially if you’re making multiple bandanas.
Final Thoughts: Your Dog’s New Fashion Statement
Making a dog bandana is genuinely one of the easiest DIY pet projects out there. With just a few basic materials and minimal sewing skills, you can create a custom accessory that your dog will rock with style. Whether you’re doing this for fun, saving money, or supporting your eco-conscious lifestyle, homemade bandanas are a win-win.
Start with a simple triangle bandana, master the basics, then experiment with different fabrics, styles, and designs. Your dog gets a cute new accessory, you get the satisfaction of creating something useful, and everyone’s happy. Plus, you’ll have an endless supply of bandanas for every season and occasion.
Now stop reading and start crafting. Your pup is waiting for their new fashion moment!