If you’re a dog parent who loves road trips with your furry best friend, then how to remove dog hair from car interiors is probably a question you’ve Googled at 2 AM while staring at your upholstery in despair. We get it. One moment your pup is happily panting out the window, and the next, your car looks like a mobile grooming salon exploded inside it. The good news? We’ve got five battle-tested methods to reclaim your vehicle from the fur invasion.
Table of Contents
- Why Dog Hair in Your Car Is Such a Nightmare
- Method 1: The Rubber Broom Technique (The Game-Changer)
- Method 2: Lint Rollers and Tape—The Quick Fix
- Method 3: The Vacuum Method (Go Professional-Grade)
- Method 4: Fabric Softener and Spray Technique
- Method 5: Professional Car Detailing (When All Else Fails)
- Prevention Tips: Stop the Fur Before It Starts
- Combining Methods for Maximum Effectiveness
- Best Products to Keep in Your Car
- Understanding Your Dog’s Shedding Cycle
- Health and Hygiene Considerations
- Frequently Asked Questions
- Final Thoughts: Reclaim Your Car
Why Dog Hair in Your Car Is Such a Nightmare
Dog hair isn’t just unsightly—it’s genuinely stubborn. Unlike human hair, dog fur has a different texture and clings to fabrics with the determination of a clingy ex. It embeds itself into seat fibers, hides in air vents, and somehow multiplies when you’re not looking. Double-coated breeds like Golden Retrievers and German Shepherds are particularly notorious offenders. The struggle is real, and it affects your car’s resale value, cleanliness, and your sanity.
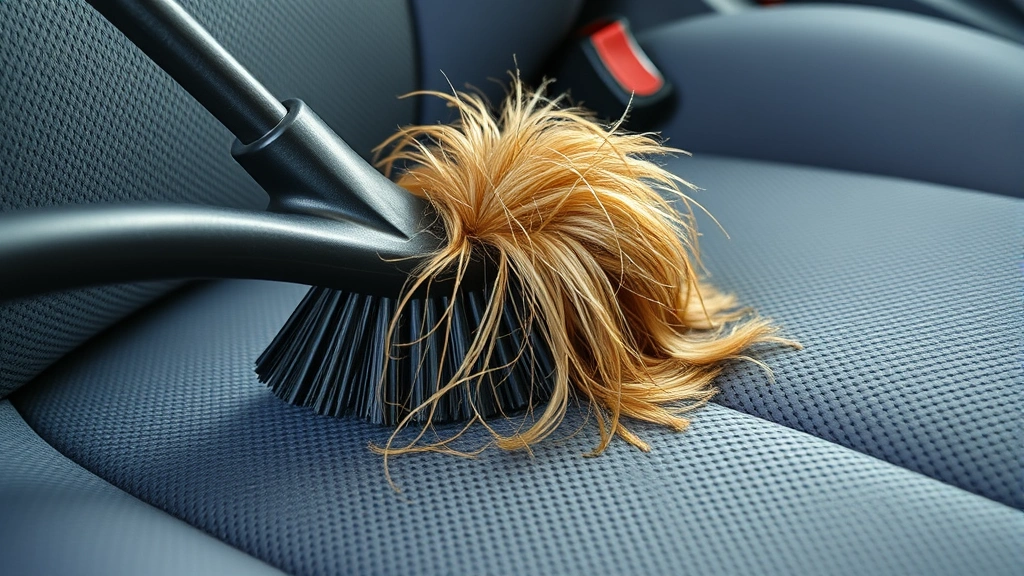
Method 1: The Rubber Broom Technique (The Game-Changer)
If you haven’t discovered the magic of a rubber broom yet, prepare to have your mind blown. This method is hands-down the most effective for removing pet hair from car seats and carpets. Rubber brooms work by creating static electricity that attracts hair like a magnet. Here’s how to use it: Start from the top of your seats and work downward in smooth, sweeping motions. The hair will ball up into clumps that you can easily pick up. It takes about 15-20 minutes for an entire car interior, and the results are genuinely impressive. Pro tip: dampen the rubber bristles slightly for even better hair collection. You can grab a quality rubber broom for $10-15, making it one of the most budget-friendly solutions available.
Method 2: Lint Rollers and Tape—The Quick Fix
When you’re in a pinch and need your car presentable in five minutes, lint rollers are your best friend. They’re perfect for targeted hair removal on specific areas like the driver’s seat or steering wheel. Keep a few in your glove compartment for emergencies. Regular lint rollers work, but invest in the heavy-duty pet versions designed specifically for animal hair—they’re stickier and more durable. For larger areas, duct tape wrapped around your hand (sticky side out) works surprisingly well and costs even less. This method won’t deep-clean your car, but it’s fantastic for maintenance between deeper cleaning sessions.
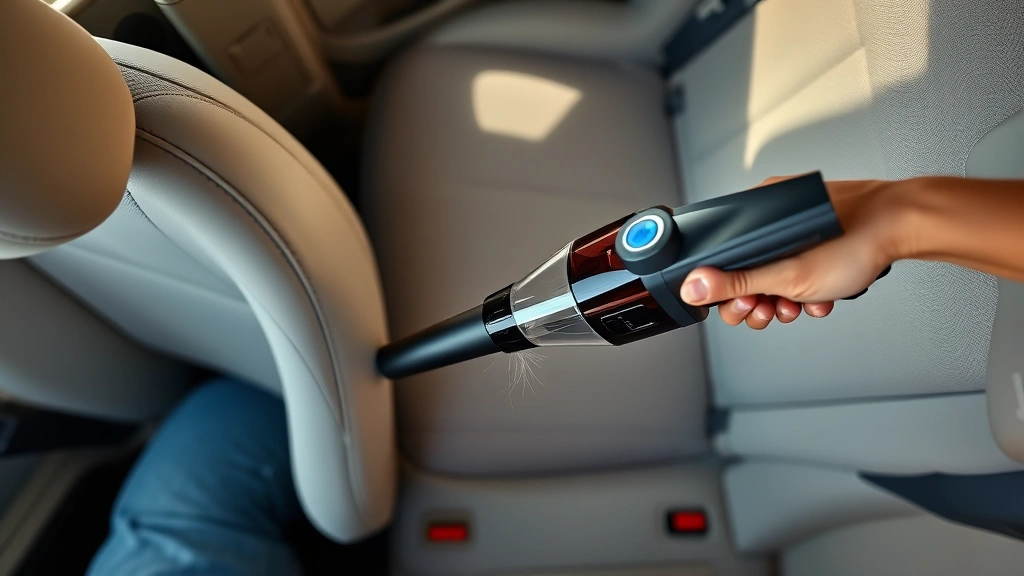
Method 3: The Vacuum Method (Go Professional-Grade)
Your regular household vacuum might struggle with dog hair, but a dedicated pet hair vacuum or a shop-vac with upholstery attachments will change your life. Wet/dry vacuums are particularly effective because they can handle both dry hair and any moisture. Invest in a handheld cordless vacuum specifically designed for pet hair—brands like Dyson and Shark make excellent car-specific models. The key is using the right attachment: crevice tools for tight spaces, brush attachments for seats, and upholstery tools for carpets. Vacuum in multiple directions to lift hair from different angles. This method is more time-consuming than the rubber broom but provides the deepest clean, especially when combined with other techniques.
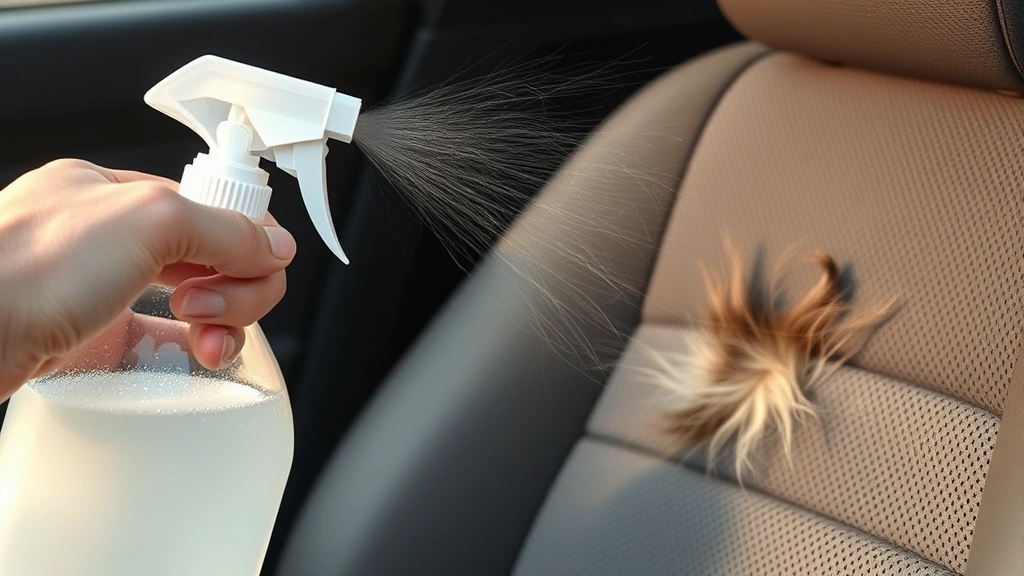
Method 4: Fabric Softener and Spray Technique
Here’s a lesser-known hack that actually works: mix fabric softener with water in a spray bottle (one part softener to three parts water). Lightly mist your car seats and let it sit for 5-10 minutes. The fabric softener loosens the grip of the hair on the fibers, making it much easier to remove with a rubber broom, lint roller, or vacuum. This method is particularly effective for stubborn, embedded hair that won’t budge with other methods. The bonus? Your car will smell fresh and clean. Just don’t oversaturate—you want a light mist, not a soaking wet seat. This technique costs almost nothing and works remarkably well as a pre-treatment before your main cleaning method.
Method 5: Professional Car Detailing (When All Else Fails)
Sometimes the fur situation is so dire that you need to call in the professionals. Professional car detailers have industrial-grade equipment and specialized techniques specifically designed to remove pet hair. They’ll use high-powered vacuums, steam cleaning, and specialized brushes that home methods simply can’t match. Yes, it costs money ($100-300 depending on your area), but if your car is absolutely covered in fur or you’re preparing to sell it, professional detailing is worth every penny. Many detailers also apply protective treatments that make future pet hair removal easier. Check out our guide on planet conscious pet care for eco-friendly detailing options.
Prevention Tips: Stop the Fur Before It Starts
The best way to manage dog hair in your car is to prevent excessive shedding in the first place. Regular grooming and brushing your dog before car rides significantly reduces loose fur. Keep a collapsible dog crate in your vehicle to contain your pup and minimize hair spread. Consider using seat covers or blankets designed for pet travel—they’re washable, removable, and make cleanup infinitely easier. Feeding your dog a high-quality diet rich in omega-3 fatty acids can improve coat health and reduce excessive shedding. Our article on sustainable dog food explores nutritious options that benefit both your dog and the environment.
Combining Methods for Maximum Effectiveness
The real secret to winning the dog hair battle is combining multiple methods. Start with the fabric softener spray to loosen embedded hair, follow up with the rubber broom for bulk removal, then use a vacuum for final deep cleaning. This three-step approach removes 95% of dog hair and takes about 30 minutes. For maintenance between deep cleans, use lint rollers and quick vacuuming sessions. The key is consistency—weekly touch-ups prevent the hair from building up to unmanageable levels.
Best Products to Keep in Your Car
Stock your vehicle with a pet hair removal kit: a rubber broom, lint rollers, a handheld vacuum, and a spray bottle with fabric softener solution. Add some microfiber cloths and you’re golden. Keep these items in a small bag in your trunk for easy access. Investing in quality tools upfront saves you time and frustration down the road. Look for products with strong reviews specifically mentioning pet hair removal effectiveness.
Understanding Your Dog’s Shedding Cycle
Different breeds shed differently, and understanding your dog’s shedding pattern helps you plan cleaning schedules. Double-coated breeds shed heavily twice yearly during seasonal changes. Single-coated breeds shed more consistently year-round but typically less intensely. Knowing when your dog sheds most allows you to schedule professional detailing or plan extra maintenance sessions accordingly. Regular grooming during peak shedding season can reduce car hair by up to 60%.
Health and Hygiene Considerations
Beyond aesthetics, dog hair accumulation in cars can affect air quality and create allergen buildup. Pet hair can clog your car’s air filters and HVAC system, reducing efficiency and increasing allergen circulation. Regular cleaning protects your respiratory health and your vehicle’s mechanical systems. If you or your passengers have pet allergies, maintaining a hair-free car becomes even more critical. Consider upgrading your car’s cabin air filter to a HEPA version for additional allergen filtration.
Frequently Asked Questions
What’s the fastest way to remove dog hair from a car?
The rubber broom method is the fastest, taking only 15-20 minutes for an entire car interior. It’s incredibly efficient and requires minimal effort compared to other methods.
Can I use a regular vacuum on my car seats?
You can, but a pet-specific or handheld cordless vacuum works much better. Regular household vacuums often lack the suction power needed for stubborn pet hair embedded in upholstery fibers.
How often should I clean dog hair from my car?
Weekly maintenance with lint rollers or quick vacuuming prevents buildup. Deep cleaning with the rubber broom method or professional detailing should happen monthly, or more frequently during peak shedding seasons.
Does dog hair damage car upholstery?
Dog hair itself doesn’t damage upholstery, but the friction from removal attempts and the moisture from wet paws can cause wear over time. Using seat covers protects your original upholstery.
Are seat covers worth it for dogs?
Absolutely. Pet seat covers are washable, removable, and make cleanup exponentially easier. They also protect your car’s resale value by keeping original upholstery pristine.
What about dog hair in air vents?
Use a crevice tool attachment on your vacuum or a small brush to carefully clean air vents. For stubborn buildup, consider professional detailing or replacing your cabin air filter.
Final Thoughts: Reclaim Your Car
Living with a dog doesn’t mean accepting a fur-covered car as your fate. Whether you choose the budget-friendly rubber broom method, the convenience of professional detailing, or a combination approach, you have plenty of effective options. The key is finding what works for your lifestyle and sticking with regular maintenance. Your car—and your sanity—will thank you. For more pet care tips, explore our resources on bamboo pet products and sustainable pet care solutions that align with your values.
Remember, dog hair in your car is a small price to pay for the joy of having your furry friend by your side on adventures. With these proven methods, you can enjoy road trips without the post-trip cleanup nightmare.