Learning how to shave a dog at home can save you a fortune in grooming bills and give your furry friend a fresh, clean look without the stress of a grooming salon visit. Whether your pup is dealing with matted fur, excessive shedding, or just needs a summer trim, knowing the right technique is crucial to keeping your dog safe, comfortable, and looking fabulous.
Table of Contents
- Why You Might Need to Shave Your Dog
- Gather Your Dog Grooming Supplies
- Step 1: Bathe and Dry Your Dog Thoroughly
- Step 2: Brush Out Any Remaining Tangles
- Step 3: Choose Your Blade Length and Test on a Small Area
- Step 4: Master the Proper Clipping Technique
- Step 5: Finish with Precision Details
- Common Mistakes to Avoid When Learning How to Shave a Dog
- Aftercare: Keeping Your Dog Comfortable Post-Shave
- Dog Shaving Tips for Different Coat Types
- When to Call in a Professional Groomer
- Sustainable Grooming Practices
- Frequently Asked Questions
- Final Thoughts: You’ve Got This
Why You Might Need to Shave Your Dog
Not all dogs need shaving, but some definitely benefit from it. Dogs with double coats—like Golden Retrievers and German Shepherds—can overheat in summer months, making a proper trim essential for their health. Other breeds like Poodles and Doodles practically demand regular shaving to prevent matting and keep their coats manageable. Even short-haired dogs sometimes need spot shaving for sanitary reasons or to remove problem areas.
Before you grab those clippers, understand that shaving isn’t just about aesthetics—it’s about your dog’s comfort and well-being. A matted coat can trap moisture and create the perfect environment for skin infections, which is why regular grooming and proper choosing the right shampoo for your dog matters tremendously.
Gather Your Dog Grooming Supplies
You can’t shave a dog without the right tools. Here’s what you’ll need before starting:
- Dog clippers: Invest in quality clippers designed specifically for dogs. Human clippers won’t cut it—literally. Look for cordless options with adjustable blade lengths.
- Clipper blades: Different blade sizes create different coat lengths. Start with a longer blade if you’re nervous.
- Grooming scissors: For precision work around the face and ears.
- Dog shampoo and conditioner: Using proper dog-safe conditioner prevents skin irritation and makes clipping easier.
- Towels: Multiple towels for drying your pup thoroughly.
- Treats: High-value rewards for keeping your dog calm and cooperative.
Step 1: Bathe and Dry Your Dog Thoroughly
The first step in learning how to shave a dog is getting them squeaky clean. A dirty coat will clog your clippers faster than you can say “matted mess.” Use lukewarm water and a quality dog shampoo, working it through the entire coat. Pay special attention to areas prone to matting—behind the ears, armpits, and the rear end.
After shampooing, rinse completely (seriously, get all the soap out) and apply a good conditioner. This makes the clipping process smoother and reduces the risk of clipper burn. Once you’ve rinsed the conditioner, dry your dog completely with towels and a blow dryer on a cool setting. Even slightly damp fur can gunk up your clippers and make the experience miserable for both of you.
Step 2: Brush Out Any Remaining Tangles
Before the clippers touch your dog’s coat, work through any remaining tangles with a slicker brush or metal comb. This is non-negotiable. Mats will cause your clippers to skip, pull hair painfully, and create an uneven cut. If you encounter stubborn mats, use a mat splitter or dematting spray—never try to force clippers through a mat.
This step is where patience pays off. Spend as much time as needed to get the coat completely tangle-free. Your dog will thank you, and your clippers will work infinitely better.
Step 3: Choose Your Blade Length and Test on a Small Area
Clipper blades are numbered, and the higher the number, the shorter the cut. A #10 blade leaves about 1/8 inch of hair, while a #4 blade leaves about 1/2 inch. For first-timers, start with a longer blade like a #4 or #5 to avoid clipper burn or cutting too short.
Before committing to the whole dog, test your clippers on a small, inconspicuous area like the inner thigh. This lets you check the blade sharpness, adjust your technique, and make sure your dog tolerates the sound and sensation. Some dogs freak out at the noise—if yours does, spend time letting them hear the clippers running while offering treats and praise.
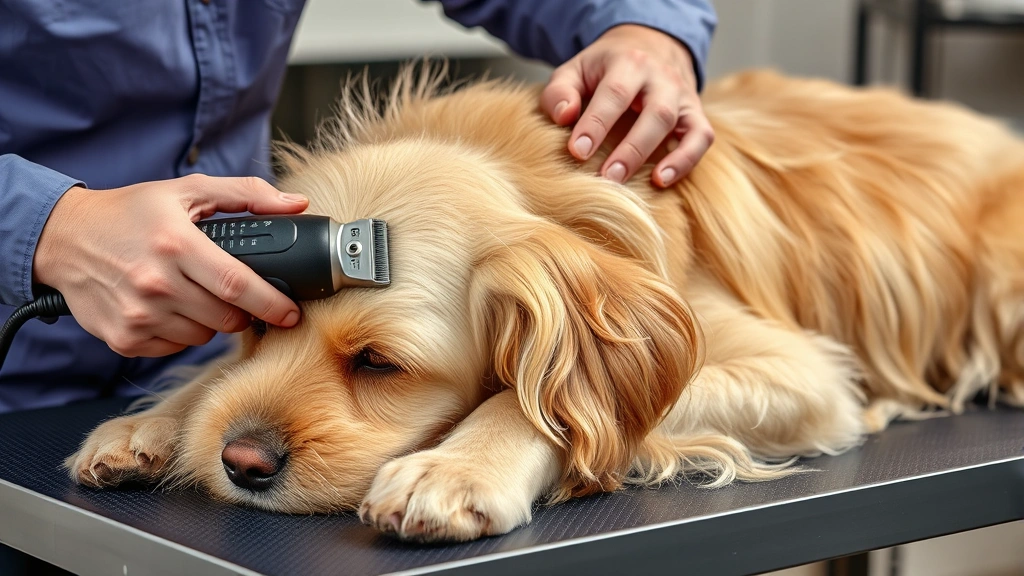
Step 4: Master the Proper Clipping Technique
Now for the actual shaving. Always clip in the direction of hair growth, never against it. Going against the grain might give a closer cut, but it increases the risk of clipper burn and irritates sensitive skin. Start with the body, using long, smooth strokes from the neck toward the rear.

Work on one section at a time, and keep the clipper flat against the skin. Don’t press hard—let the blade do the work. Pay extra attention to sensitive areas like the belly, inner legs, and around the genitals where skin is thinner and more prone to nicks.
For double-coated breeds, you might need to do a two-pass technique: first with a longer blade to remove the outer coat, then with a shorter blade for the undercoat. This prevents clipper clogging and gives a more even result.
Step 5: Finish with Precision Details
Once the body is done, use grooming scissors for the detailed work around the face, ears, paws, and rear end. This is where you can create a polished look and ensure safety around sensitive areas. Never use clippers on the face—scissors give you much better control.
Trim around the eyes carefully, keeping hair out of the line of sight. Tidy up the ear edges (without cutting into the ear itself), and clean up the paw pads by removing hair between the toes. For the rear end, trim conservatively—you want to maintain some coverage for sanitary purposes without creating a matting trap.
Common Mistakes to Avoid When Learning How to Shave a Dog
Plenty of well-intentioned dog parents mess up their first grooming attempt. Here are the biggest blunders:
- Clipping a dirty or damp coat: This clogs clippers and creates an uneven cut.
- Using dull blades: Dull blades pull hair instead of cutting it, causing pain and potential clipper burn.
- Clipping against the grain: This causes irritation and discomfort.
- Pressing too hard: You’re not trying to sand your dog down; gentle pressure is all you need.
- Skipping the mat removal: Mats will wreck your clippers and hurt your dog.
- Using human clippers: They’re designed differently and won’t work on dog coats.
Aftercare: Keeping Your Dog Comfortable Post-Shave
After you’ve finished shaving, your dog’s skin is exposed and sensitive. Apply a pet-safe moisturizer or products with collagen for dogs to soothe and protect the skin. Keep your dog out of direct sunlight for a few days, as their skin can sunburn just like ours.
Watch for signs of clipper burn—red, irritated patches of skin. If you notice these, apply aloe vera or a vet-recommended healing salve. Also monitor for any signs of infection or excessive itching, which could indicate a skin issue.
Dog Shaving Tips for Different Coat Types
Not all dog coats are created equal. Curly-coated breeds like Poodles and Doodles need more frequent shaving to prevent matting. Double-coated breeds like German Shepherds and Labs can go longer between trims. Smooth-coated breeds rarely need full shaves but benefit from spot grooming.
Understanding your dog’s specific coat type helps you determine shaving frequency and technique. Research your breed’s grooming needs, or consult with a professional groomer to learn what works best for your pup’s unique coat.
When to Call in a Professional Groomer
There’s no shame in admitting that grooming your dog at home isn’t for you. If your dog is aggressive, extremely anxious, or has a complicated coat, a professional groomer is worth every penny. They have the experience, equipment, and patience to handle tricky situations.
Even if you usually groom at home, consider professional grooming for breeds with specific style requirements or if your dog needs a full shave for medical reasons. Professional groomers can also provide valuable guidance on maintaining your dog’s coat between appointments.
Sustainable Grooming Practices
If you’re committed to grooming your dog at home, consider adopting zero waste pet care practices. Invest in quality, durable grooming tools that last years rather than replacing cheap clippers constantly. Use eco-friendly dog shampoos and conditioners, and compost or responsibly dispose of your dog’s hair.
Home grooming also reduces your carbon footprint by eliminating trips to the groomer. It’s a win for your wallet, your dog’s comfort, and the planet.
Frequently Asked Questions
Can I shave my dog in winter?
Technically yes, but you probably shouldn’t. Winter shaving removes your dog’s natural insulation, making them cold and uncomfortable. Unless your dog has a medical condition requiring shaving, stick to grooming in warmer months or maintaining their coat with regular brushing in winter.
How often should I shave my dog?
It depends on your dog’s breed and coat type. Double-coated breeds typically need shaving 1-2 times per year, while curly-coated breeds might need it every 6-8 weeks. Discuss frequency with your vet or a professional groomer based on your specific dog.
Will shaving my dog make their coat grow back thicker?
This is a common myth with no scientific basis. Shaving doesn’t affect how thick your dog’s coat grows back. What you might notice is that freshly grown hair appears darker or coarser because it hasn’t been sun-bleached yet.
What if I accidentally cut my dog’s skin?
Minor nicks happen even to professionals. Clean the area with warm water, apply pressure with a clean cloth to stop bleeding, and use an antibiotic ointment. If the cut is deep or won’t stop bleeding, contact your vet immediately.
Is it normal for my dog to be anxious during shaving?
Many dogs feel nervous about the clipper noise and sensation. Make the experience positive by introducing clippers gradually, offering high-value treats, and keeping sessions short at first. Some dogs need multiple sessions to build confidence.
Final Thoughts: You’ve Got This
Learning how to shave a dog is absolutely doable for most pet parents. It takes practice, patience, and the right tools, but once you master the technique, you’ll save money and give your dog a fresh, comfortable look. Start slow, invest in quality equipment, and don’t hesitate to ask for professional help if you need it.
Your dog’s comfort and safety are paramount, so prioritize their well-being over perfection. Even an imperfect DIY shave is better than a stressed-out trip to the groomer for some dogs. Keep learning, stay patient with yourself and your pup, and soon you’ll be a grooming pro.